To add a timer to your basic coffee machine, first choose a compatible timer type—digital for precision or mechanical for simplicity. Next, verify your machine is unplugged, then clean it thoroughly. Securely connect the timer to the power source, adjust the timer settings, and double-check AM or PM. Once programmed, test the setup to confirm it functions correctly. Optimizing your brew is essential, and further insights can enhance your coffee-making experience.
Understanding Your Coffee Machine
To effectively add a timer to your coffee machine, it's important to first understand its components and features. Familiarize yourself with the coffee machine basics, including the water reservoir, brewing chamber, and control panel. Each element plays a significant role in the machine's overall functionality. The control panel typically houses the settings for programming, including time adjustments and brew strength options. Understanding these features allows you to grasp how a timer can integrate seamlessly into your coffee-making routine. You'll also want to take into account how the timer interacts with the machine's brewing cycle, ensuring it complements rather than complicates the process. This functionality overview will help you make informed decisions as you enhance your coffee experience with automation.
Choosing the Right Timer
When choosing a timer for your coffee machine, you'll need to take into account the different types available and their specific features. Compatibility with your coffee machine is essential, as not all timers work with every model. Evaluating these factors will help guarantee you select the right timer for ideal brewing convenience.
Types of Timers
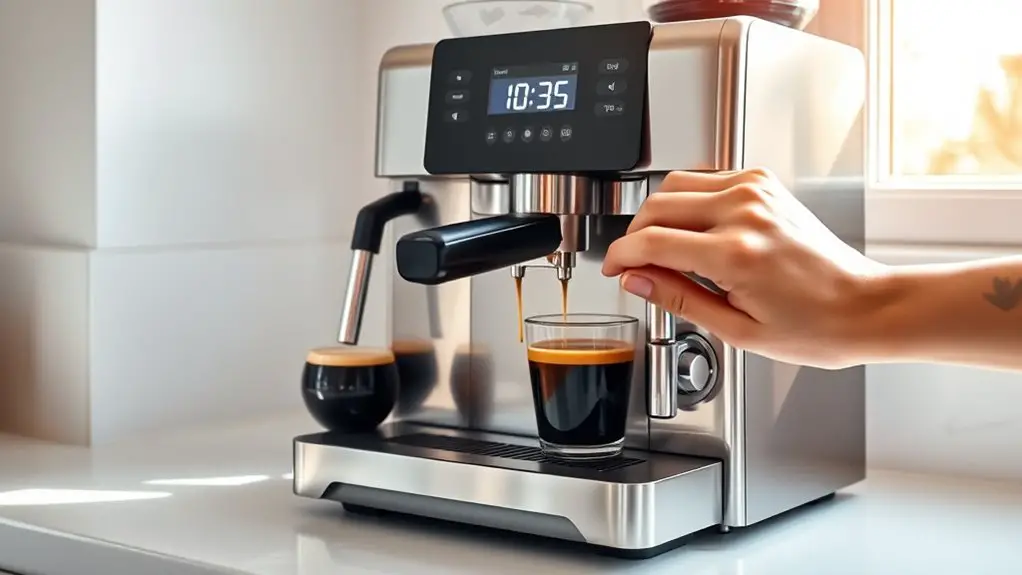
Choosing the right timer for your coffee machine can greatly enhance your brewing experience, especially if you enjoy waking up to the aroma of freshly brewed coffee. There are two main types of timers to evaluate: digital timers and mechanical timers. Digital timers offer precision and flexibility, allowing you to program multiple brewing sessions with ease. They often come with features like countdowns and LCD displays, making it simple to keep track of your brewing time. On the other hand, mechanical timers are straightforward and user-friendly, relying on a simple dial to set the desired brewing duration. If you prefer a no-fuss approach, a mechanical timer might be best. Assess your needs and choose the timer that aligns with your coffee brewing lifestyle.
Timer Features to Consider
There are several key features you should consider when selecting a timer for your coffee machine to guarantee it meets your brewing needs. First, decide between digital timers and manual timers. Digital timers often offer programmable settings, enabling you to set multiple brew times, while manual timers provide simplicity for straightforward use. Look for a timer with an easy-to-read display; clarity is essential, especially in dim lighting. Additionally, consider the duration of the timer; some allow for longer or shorter brewing cycles, which can enhance flavor extraction. Finally, ascertain the timer has a reliable alarm system to alert you when brewing is complete, allowing you to enjoy your coffee at its freshest without constant checking.
Compatibility With Coffee Machines
Ensuring your timer is compatible with your coffee machine is essential for seamless operation and ideal brewing. Start by checking the machine specifications, including voltage, power requirements, and connection types. Some timers might be designed for specific models or brands, so confirm that your chosen timer aligns with your coffee maker's configuration. Additionally, consider whether you're working with a standard drip machine or a programmable one, as this affects timer compatibility. It's also wise to read user reviews and product descriptions to gauge how well the timer integrates with similar machines. By prioritizing compatibility, you can enjoy the freedom of perfectly brewed coffee at your desired times, without the hassle of mismatched components.
Preparing Your Coffee Machine
Before you can effectively add a timer to your coffee machine, it's essential to prepare the device properly. Start by unplugging the machine to guarantee safety during the process. Next, employ appropriate cleaning techniques to remove any coffee residue and oils that may have accumulated. Use a mixture of water and vinegar for descaling if necessary, assuring peak performance. Pay attention to all components, including the brew basket and water reservoir. Regular machine maintenance is key; check for any wear or damage, replacing parts as needed. Once cleaned and inspected, allow the machine to dry completely before proceeding. This thorough preparation not only enhances the timer installation but also prolongs the lifespan of your coffee machine.
Setting Up the Timer
Once you've prepared your coffee machine, setting up the timer is a straightforward process that can enhance your morning routine. Begin with the timer installation; guarantee it's securely connected to the machine's power source. Next, locate the timer settings on the device, which typically include options for hours and minutes. Adjust these settings according to your desired brew time. Make sure to double-check that the timer is set to AM or PM, depending on your preference. If your coffee machine has a visual display, confirm that the time is accurate. Finally, test the setup by activating the timer to verify everything functions correctly. This initial setup will grant you the freedom to enjoy fresh coffee whenever you want.
Programming Your Coffee Machine
With the timer successfully set, the next step is programming your coffee machine to align with your brewing preferences. Begin by accessing the timer programming feature, typically found in the settings menu. You'll want to adjust the brewing time to guarantee your coffee brews at the desired hour. Some machines allow for multiple settings; take advantage of coffee automation by scheduling different brew times for weekdays and weekends. After inputting your desired settings, confirm them by pressing the "Save" button. This guarantees your machine retains the programming even after being turned off. Finally, familiarize yourself with any additional features, like brew strength or temperature settings, to maximize your coffee experience. Enjoy the freedom of automated brewing!
Testing the Timer Function
Testing the timer function is essential to guarantee your coffee machine operates as intended. Start by programming the timer for a specific brew time, then observe the machine's performance. Monitor timer accuracy by comparing the set time to the actual brew time. Gather user feedback to assess satisfaction and make necessary adjustments.
Here's a simple table to track your results:
| Test Time (Minutes) | Actual Brew Time (Minutes) | User Feedback |
|---|---|---|
| 5 | 5 | Perfectly brewed |
| 10 | 9 | Slightly under-brewed |
| 15 | 15 | Just right |
| 20 | 20 | Ideal for my taste |
Troubleshooting Common Issues
Even after thorough testing, you may encounter issues with your coffee machine's timer function. If you experience coffee brewing delays, first check the timer settings. Verify it's programmed correctly and that the machine is plugged in. A faulty timer might require you to reset or replace it—explore timer malfunction solutions like recalibrating or inspecting connections. If your machine's timer isn't responding, inspect for any software glitches or mechanical faults. Sometimes, simply unplugging the unit for a few minutes can restore functionality. If problems persist, consult the user manual or seek professional assistance. Remember, addressing these issues promptly helps maintain your desired brewing schedule and guarantees you enjoy that perfect cup of coffee each time. Additionally, ensure that the brewing process is not interrupted by checking for leaks, which could affect consistent operation.
Tips for Optimal Brewing
To achieve the best flavor and aroma from your coffee, it's essential to pay attention to various brewing factors. Here are three tips for optimal brewing:
- Use Fresh Coffee Beans: Always choose high-quality, freshly roasted beans. Coffee freshness directly impacts flavor, so grind just before brewing.
- Control Water Temperature: Ideal brewing temperature ranges between 195°F to 205°F. Too hot or too cold water can ruin your coffee's taste.
- Experiment with Brewing Techniques: Try different methods like pour-over, French press, or AeroPress to discover what suits your palate best. Adjusting variables like brew time can enhance your coffee experience. Additionally, consider the grind size of your coffee, as it significantly influences the extraction and overall flavor of your brew.
Frequently Asked Questions
Can I Use Any Timer With My Coffee Machine?
You can't just use any timer; timer compatibility varies. Check your coffee machine's specifications and verify the timer features align. Some timers offer programmable settings, which can enhance your brewing experience based on your preferences.
Will Adding a Timer Void My Coffee Machine Warranty?
Adding a timer may void your coffee machine's warranty, depending on the manufacturer's policy regarding modifications. It's crucial to review warranty implications before proceeding with timer installation to avoid potential issues. Always check the manual first.
How Do I Clean My Coffee Machine After Installation?
After installation, use vinegar or descaling solutions as effective cleaning methods. Run a cycle to remove residue, then rinse thoroughly. Regular maintenance tips include cleaning the filter and water reservoir to guarantee peak performance.
Can I Set Multiple Timers for Different Brewing Times?
You can't set multiple timers on a basic model, limiting your brewing time optimization. Consider upgrading to machines with multiple timer functionality, allowing you to brew different types of coffee effortlessly, just like a sophisticated gadget from the future.
What Happens if the Power Goes Out While Brewing?
If there's a power interruption during the brewing process, your coffee machine will stop. Once power returns, it usually won't resume automatically, so you'll need to restart the brewing cycle manually to complete it.