Yes, you can replace the heating element in your coffee maker. This repair can enhance brewing efficiency and improve coffee quality. First, gather the right tools, including screwdrivers and a multimeter. Unplug the machine, then carefully open the casing to locate and disconnect the heating element. Installing the new element requires precision; make certain all connections are secure. After replacing, you should test the machine to verify ideal temperature. Stick around to uncover essential maintenance tips for your coffee maker.
Understanding the Role of the Heating Element
Although you might not think about it often, the heating element in your coffee maker plays a crucial role in the brewing process. It's responsible for heating water to the ideal temperature, enhancing extraction and flavor. A well-functioning heating element guarantees maximum heating efficiency, allowing the water to reach around 200°F, which is important for brewing a rich cup of coffee. Over time, mineral deposits can accumulate, impacting the element's lifespan and performance. Regular maintenance, like descaling, can prolong its functionality and prevent overheating, which could lead to premature failure. Understanding these technical aspects empowers you to take control of your coffee-making experience, making sure you consistently enjoy the freedom of excellent coffee at home.
Signs Your Coffee Maker Needs a New Heating Element
Recognizing when your coffee maker's heating element needs replacement is crucial for maintaining peak brewing performance. If you notice a decline in coffee quality, it's a strong indicator that the heating element may be failing. A brewing temperature that consistently falls below the ideal range of 195°F to 205°F can result in under-extracted coffee, leading to a bitter or sour taste. Additionally, if your coffee maker takes longer than usual to brew, this delay could signal an inefficient heating element. Unusual noises during operation may also suggest internal issues. Keep an eye out for these signs; they'll help you determine when it's time to think about replacing the heating element to guarantee your morning brew remains delightful.
Assessing the Feasibility of Repair
Before you proceed with the repair, you'll need to gather specific tools such as a screwdriver, multimeter, and soldering iron. It's also essential to take into account safety precautions, including unplugging the coffee maker and discharging any capacitors to prevent electrical shock. Evaluating these factors will help you determine whether the repair is feasible and worth undertaking.
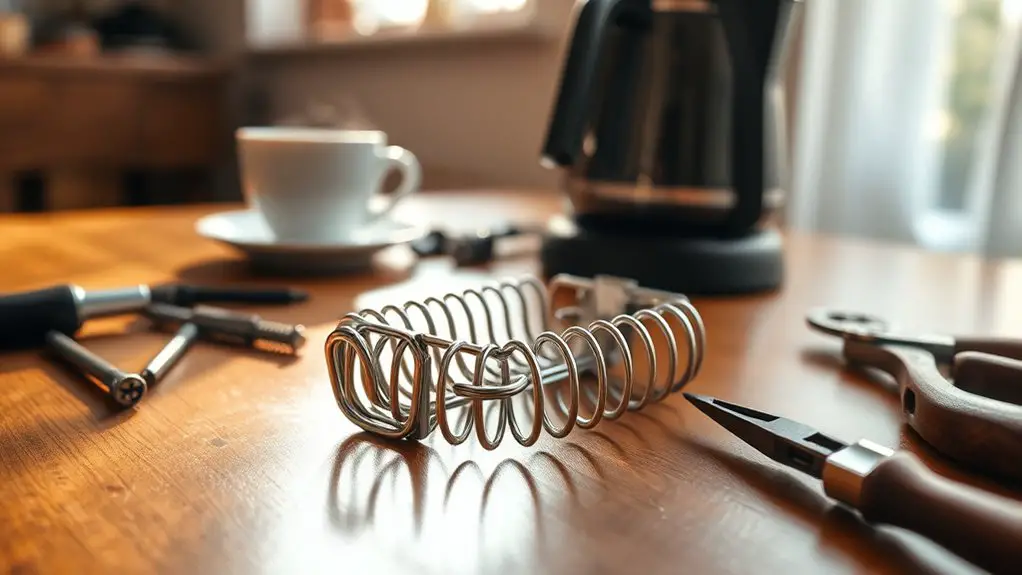
Tools Required for Repair
To successfully replace the heating element in your coffee maker, you'll need a specific set of tools that guarantee a smooth and efficient repair process. Start with a screwdriver set, as different screw types may be used. A multimeter is essential for testing electrical connections and ensuring the new element functions correctly. Consider having a pair of pliers and wire strippers handy, as these tool types are often necessary for disconnecting wires and making secure connections. A repair kit specifically designed for coffee makers can be invaluable, providing not only replacement parts but also essential tools. By gathering these tools beforehand, you'll set yourself up for a successful and liberating DIY repair experience.
Safety Precautions to Consider
Proper preparation with the right tools is just the first step in replacing the heating element of your coffee maker; ensuring your safety throughout the process is equally important. Before you begin, wear protective gear, including safety goggles and gloves, to shield yourself from potential hazards. Disconnect the coffee maker from the power source to eliminate any risk of electrical shock—this is essential for electrical safety. Examine the area where you'll work for any water or conductive materials, as moisture can lead to dangerous situations. Finally, familiarize yourself with the manufacturer's guidelines, as they often contain critical safety warnings. By taking these precautions, you empower yourself to tackle the repair confidently and responsibly.
Tools and Materials Needed for Replacement
Before you begin replacing the heating element, you'll need to gather several essential tools and materials. You'll require screwdrivers, a multimeter, and possibly a soldering iron, depending on your coffee maker's design. Additionally, having the correct replacement part on hand is vital for a successful repair, so make certain you know the specifications of the heating element needed for your model.
Essential Tools Required
While replacing the heating element in your coffee maker may seem intimidating, having the right tools and materials at your disposal can simplify the process considerably. First, you'll need a set of essential tools: a screwdriver (Phillips and flathead), pliers, and a multimeter for testing electrical components. A soldering iron may also be necessary for any wiring repairs. Additionally, consider purchasing a repair kit specifically designed for your coffee maker model, which often includes replacement parts and seals. Having a work surface and proper lighting can enhance your efficiency and safety during the replacement. With these essential tools, you can approach the task confidently, ensuring a successful repair and restoring your coffee maker to peak functionality.
Replacement Parts Overview
When replacing the heating element in your coffee maker, you'll need several key components to guarantee a successful repair. First, identify the replacement parts types specific to your model, such as the heating element, thermal fuse, and any necessary gaskets. You'll also require basic tools like a screwdriver and possibly a multimeter for testing electrical connections. Sourcing replacement parts can be done through manufacturer websites or reliable third-party suppliers. Ascertain the parts are compatible with your coffee maker model to avoid complications. Once you've gathered all materials, you'll be ready to proceed methodically with the repair, ensuring each component is installed correctly for peak functionality. This approach not only enhances your coffee maker's performance but also empowers you with hands-on skills.
Step-by-Step Guide to Replacing the Heating Element
Replacing the heating element in your coffee maker can seem challenging, but with the right tools and a systematic approach, it's a manageable task. First, identify the heating element type compatible with your specific coffee maker brand. Gather a screwdriver, multimeter, and replacement heating element.
| Step | Action | Tools Needed |
|---|---|---|
| 1 | Unplug the coffee maker | None |
| 2 | Open the casing | Screwdriver |
| 3 | Locate the heating element | Multimeter |
| 4 | Disconnect and replace | Replacement part |
Carefully follow these steps to guarantee a proper replacement. If you encounter any issues, consult the manufacturer's guide for assistance tailored to your coffee maker brand.
Safety Precautions to Take Before Starting
Before diving into the replacement of your coffee maker's heating element, it's important to prioritize safety. Start by gathering appropriate safety gear, such as gloves and safety goggles, to protect yourself from potential hazards. Verify your coffee maker is unplugged to eliminate any risk of electrical shock. Familiarize yourself with its internal components, as understanding the layout helps maintain electrical safety during the process. Use insulated tools designed for electrical work to avoid accidental short circuits. Additionally, work in a dry area to prevent moisture-related hazards. Taking these precautions not only safeguards your well-being but also empowers you to tackle the replacement process confidently and efficiently. Remember, a methodical approach leads to a successful outcome.
Common Mistakes to Avoid During Replacement
Although it might seem straightforward, replacing the heating element in your coffee maker can lead to several common pitfalls that can hinder your progress or cause damage. One major mistake is neglecting to disconnect all power sources before beginning the replacement, which could result in electrical shock. Additionally, not documenting the wire configurations can complicate reassembly; take notes or photos during disconnection. Be cautious with screws—over-tightening them may crack the casing. Using a generic replacement part instead of the manufacturer's specified component can lead to compatibility issues. Finally, don't skip the troubleshooting tips; if the coffee maker doesn't heat up after replacement, check connections and verify the new element is functioning properly.
Testing Your Coffee Maker After Repair
How can you guarantee your coffee maker is back to brewing perfection after replacing the heating element? Employing reliable testing methods is crucial to assess the repair performance. Start with these steps:
Ensure your coffee maker brews perfectly after a heating element replacement by conducting thorough tests for performance and safety.
- Visual Inspection: Check for any visible leaks or loose connections.
- Water Test: Run a cycle with plain water to observe heating efficiency.
- Temperature Measurement: Use a thermometer to verify that the water reaches ideal brewing temperature (195°F to 205°F).
- Brew Test: Brew a small pot of coffee and evaluate the flavor consistency.
- Safety Check: Confirm all safety features, like auto shut-off, function properly.
Following these steps will confirm that your coffee maker is not just operational but performing excellently. Enjoy your newfound brewing freedom!
Maintenance Tips to Prolong Your Coffee Maker's Life
Maintaining your coffee maker can greatly extend its lifespan and enhance brewing performance. Start with routine cleaning; descale your machine every 1-3 months, depending on water hardness. Use a mixture of vinegar and water to eliminate mineral buildup that can affect heating efficiency. Regular cleaning prevents calcium deposits that can affect the taste and freshness of brewed coffee.
In addition, regularly clean the carafe and filter basket to prevent oil residue accumulation, which can impact flavor. Always make certain the coffee maker's exterior is wiped down, removing any spills or grime.
Check the power cord and plug for wear or damage, as this can pose safety risks. Finally, store your coffee maker in a dry, cool place when not in use to protect its components from moisture and heat. Following these coffee maker maintenance tips keeps your machine in top shape.
Frequently Asked Questions
Can I Use a Different Heating Element Than the Original?
When considering a different heating element, remember that compatibility matters. Using an incompatible part can lead to safety concerns, potentially jeopardizing your coffee maker's performance and your well-being. Always prioritize proper fitting and safe operation.
How Long Does a Heating Element Usually Last?
Typically, a heating element's lifespan ranges from 2 to 5 years. For ideal performance, consider troubleshooting tips like regular maintenance and monitoring for signs of wear. This guarantees your equipment continues to function efficiently and reliably.
What Brands Are Easiest for Heating Element Replacement?
If you consider a Cuisinart brewer, replacing the heating element is straightforward. Many users find it manageable, with replacement costs typically under $30. Other brands, like Mr. Coffee, offer similar simplicity and affordability for DIY repairs.
Will Replacing the Heating Element Void My Warranty?
Replacing the heating element might void your warranty, depending on warranty terms and manufacturer policies. It's essential to review these details before proceeding, ensuring you understand the implications of such modifications on your appliance's coverage.
Can I Replace the Heating Element Myself, or Should I Hire a Professional?
Imagine diving into a DIY adventure, but safety precautions are your lifebuoy. If you're skilled and cautious, you might replace that heating element yourself; otherwise, hiring a professional guarantees a seamless, worry-free repair experience.