You can steam milk at home without a frothing wand using several techniques. Try the jar method by shaking heated milk in a jar or the French press method to plunge air into heated milk. A whisk also works well for manual frothing, while a blender can create great foam too. Using these methods, you'll achieve rich, creamy microfoam perfect for your coffee creations. There's even more to discover about enhancing your steamed milk experience.
Understanding the Basics of Milk Steaming
When it comes to steaming milk, understanding the basics can make all the difference in achieving that perfect texture and flavor. Mastering key milk steaming techniques is essential. Start by heating your milk to around 150°F, as this temperature allows for ideal sweetness without scalding. Incorporate air into the milk by angling your container, creating a whirlpool effect. This is where the milk frothing science comes into play, as it helps incorporate microbubbles that result in a creamy microfoam. Remember, the goal is to achieve a velvety texture that's both stable and rich. Practice these techniques, and you'll gain the freedom to create barista-quality drinks right at home, elevating your coffee experience to new heights.
Choosing the Right Milk for Steaming
When it comes to steaming milk, the type you choose can markedly affect your results. Whole milk, with its higher fat content, creates a rich, velvety texture, while alternatives like skim or non-dairy options provide different frothing characteristics. Understanding these differences will help you select the perfect milk for your steaming needs.
Milk Types Comparison
Choosing the right milk for steaming can make all the difference in your coffee creations, as different types of milk yield varying textures and flavors. Whole milk offers a rich, creamy mouthfeel and balanced sweetness, making it a favorite for lattes. Skim milk, while lower in calories, can produce a frothy texture but may lack the depth of flavor. Almond milk provides a nutty profile, and soy milk can be thicker, each offering unique milk flavor profiles that cater to diverse palates. Don't forget about the milk nutritional differences; oat milk is a great option for those seeking a lactose-free alternative with a hint of sweetness. Exploring these options can elevate your coffee experience.
Fat Content Impact
The fat content in milk greatly influences the steaming process and the final texture of your coffee drinks. Higher fat milk, like whole milk, creates a richer and creamier milk texture, giving your beverages a luxurious feel. It's perfect for lattes and cappuccinos that crave velvety microfoam. On the other hand, low-fat or skim milk can lead to a lighter, less creamy texture, which might satisfy those seeking a more invigorating drink but often lacks the desired microfoam quality. If you're experimenting, consider blending different types of milk to achieve your ideal balance. Remember, the choice of milk isn't just about health; it's about crafting the perfect cup that reflects your taste and freedom to enjoy coffee your way.
Preparing Your Tools and Equipment
Before you start steaming milk, you'll need to gather the right tools and equipment. Selecting a suitable container is essential, as it affects how evenly the milk heats. Also, consider your heat source; it can make a significant difference in achieving that perfect froth.
Essential Milk Frothing Tools
Creating perfectly steamed milk is all about using the right tools. To master the milk frothing basics, you'll need a few essential tools that elevate your coffee experience. Here's what you should gather:
- Small saucepan: Ideal for heating milk evenly.
- Thermometer: To monitor your milk's temperature accurately.
- Whisk: A handheld whisk or a balloon whisk works wonders for frothing.
- Milk pitcher: Helps pour and control the milk while frothing.
- Stirring spoon: Necessary for mixing and achieving a consistent texture.
With these essential tools in hand, you're well on your way to creating velvety, steamed milk that'll transform your coffee drinks into café-quality delights. Enjoy the journey of crafting your perfect froth!
Choosing the Right Container
Selecting the right container for steaming milk can make a significant difference in the quality of your froth. Choose container materials that can withstand heat, like stainless steel or glass. Stainless steel is particularly favored for its durability and ability to retain heat. When it comes to container sizes, opt for a vessel that allows enough space for the milk to expand while frothing. A smaller container may limit your frothing potential, while a larger one can make it harder to achieve the desired texture. Aim for a container that holds about 12 to 16 ounces of liquid. This balance will give you the freedom to create rich, velvety foam without spilling or overfilling. Happy steaming!
Heat Sources for Steaming
When it comes to steaming milk, having the right heat source is essential for achieving that perfect texture and temperature. You've got a couple of main options to evaluate: stovetop steaming and microwave steaming. Each has its perks, so pick what suits your style best.
- Stovetop Steaming: Offers precise control over heat and texture.
- Microwave Steaming: Quick and convenient for those on the go.
- Double Boiler: Great for gentle heating, preventing scalding.
- Electric Kettle: Some models have a steaming option for easy use.
- Induction Cooktop: Fast and efficient, perfect for serious coffee enthusiasts.
Choose your heat source wisely, and you'll be on your way to creamy, delicious steamed milk!
The Jar Method: Steaming With a Jar
Steaming milk with a jar is a surprisingly effective method that brings café-quality frothed milk right to your kitchen. To use the jar technique, start by pouring your milk into a clean, microwave-safe jar, filling it no more than halfway. Secure the lid tightly and shake vigorously for about 30 seconds. This aerates the milk, creating tiny bubbles that enhance its texture. Next, remove the lid and microwave the jar for 30-45 seconds, being careful not to let it boil. As you heat it, the milk consistency will improve, becoming velvety and smooth. Once done, gently swirl the jar to integrate the foam, and pour it over your favorite coffee for a delightful treat. Enjoy your freedom to create!
The French Press Method: A Simple Alternative
If you're looking for another simple method to froth milk, the French press might be your new best friend. This handy kitchen tool can create rich, frothy milk in just a few minutes. Here's how to do it:
- Pour your desired amount of milk into the French press.
- Heat the milk gently on the stove or in a microwave, avoiding boiling.
- Secure the lid and plunge the French press up and down vigorously.
- Continue this motion for about 30 seconds, or until the milk doubles in volume.
- Pour your frothed milk over your coffee or espresso.
Using the French press for milk frothing is not only easy but also gives you a delightful texture that enhances your drink. Enjoy your homemade café experience!
The Microwave Method: Quick and Easy
For those in a hurry, the microwave method offers a quick and effective way to steam milk without any fancy equipment. Start by pouring your desired amount of milk into a microwave-safe container, leaving some space for expansion. Cover it loosely to prevent spills. Microwave the milk for about 30 to 45 seconds, but keep an eye on it—microwave timing is essential to avoid boiling. Once it's heated, give it a gentle swirl to improve the milk texture. You're aiming for a creamy, frothy finish. If you want more foam, you can whisk it briefly after microwaving. This method is perfect for those spontaneous coffee moments when you crave a barista-style drink at home. Enjoy your liberating cup!
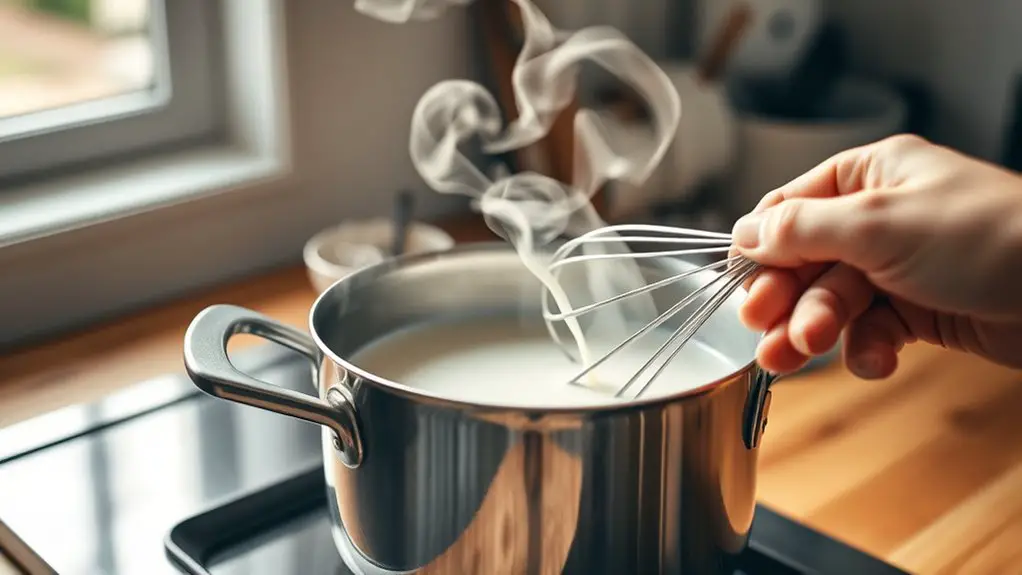
The Whisk Method: Manual Frothing Techniques
While the microwave method is great for a quick fix, the whisk method offers a hands-on approach that many coffee enthusiasts appreciate. With just a simple whisk, you can achieve impressive frothing consistency that elevates your coffee experience. Here are some whisk techniques to get you started:
- Heat your milk on the stove or in the microwave, but don't boil it.
- Choose a whisk that feels comfortable and offers good leverage.
- Start whisking vigorously in a circular motion, incorporating air.
- Gradually increase speed for a richer foam.
- Keep whisking until you reach your desired frothing consistency.
Additionally, using low acid coffee beans can enhance your coffee experience by preventing oat milk curdling. Embrace this manual frothing technique, and you'll find it not only satisfying but a true expression of your coffee craft. Enjoy the freedom to create!
The Blender Method: Creating Foam With a Blender
The blender method offers a convenient and efficient way to create milk foam that rivals café-quality froth. With various blender types at your disposal—like immersion, countertop, or even high-speed blenders—you can experiment to find the best fit for your needs. Start by heating your milk, then pour it into your chosen blender. Blend on medium speed for about 30 seconds, watching as the foam forms. For a denser foam consistency, you might want to increase blending time or use a high-speed option. Just keep an eye on the milk to avoid overflow! Once it reaches your desired texture, pour it over your coffee and enjoy the luxurious, barista-style foam you created right in your kitchen.
Tips for Achieving the Perfect Foam
To create that dreamy foam, you need to pay attention to the milk's temperature; too hot or too cold can ruin your efforts. Once you've got the right temp, mastering your whisking technique is key to incorporating air effectively. Let's explore how these elements come together for the perfect frothy finish.
Milk Temperature Matters
Getting the milk temperature just right is essential for achieving that perfect foam. When you heat your milk, remember that the ideal range is between 150°F and 155°F. This balance enhances milk sweetness while creating a silky milk texture. Here are some tips to help you nail that temperature:
- Use a thermometer for accuracy.
- Heat gradually to avoid scalding.
- Swirl the milk to distribute heat evenly.
- Look for steam rising, but avoid boiling.
- Taste-test to verify sweetness is just right.
Keeping these points in mind will lead you to creamy, delightful milk that elevates your drinks. Experiment with temperatures and find what suits your palate, and you'll soon master the art of steaming milk without a frothing wand!
Whisking Techniques Explained
Mastering the art of whisking can make all the difference in creating that velvety foam you crave for your coffee drinks. Start by choosing a sturdy whisk, and then focus on your whisking speed. A rapid, circular motion generates more air, essential for that light texture. Aim for a whisking angle of about 45 degrees; this allows the milk to circulate effectively and trap air. Don't hesitate to adjust your technique—sometimes a gentle flick or a more vigorous whirl can yield different results. Keep an eye on your milk's temperature, ensuring it doesn't overheat. With practice, you'll find your rhythm, creating the perfect foam for lattes, cappuccinos, or any drink that deserves a touch of luxury.
Enjoying Your Steamed Milk Creations
There's something delightful about savoring a cup of coffee topped with perfectly steamed milk, and you don't need a frothing wand to achieve that bliss. Once you've mastered the art of steaming, it's time to relish the experience. Enjoying your creations involves exploring various steamed drinks, each enhanced by unique milk flavors. Here are some ideas to elevate your coffee experience:
- Add a hint of vanilla for warmth.
- Try caramel syrup for a sweet twist.
- Infuse with hazelnut for a nutty touch.
- Experiment with chocolate for a mocha delight.
- Use flavored milk, like almond or oat, for a creamy alternative.
Each sip becomes a journey, showcasing your creativity while savoring the freedom of crafting your perfect drink. Enjoy!
Frequently Asked Questions
Can I Steam Non-Dairy Milk Alternatives?
Think of non-dairy milk options as blank canvases; you can absolutely steam them! Use various steaming techniques, like heat and whisking, to create creamy textures that elevate your favorite beverages, granting you delightful freedom in every sip.
How Long Should I Steam the Milk For?
When steaming milk, aim for about 30 seconds to achieve ideal milk textures. Experiment with different milk steaming techniques to find your perfect balance of temperature and foam, enhancing your beverages without compromising flavor. Enjoy the freedom of choice!
What Temperature Should the Milk Reach When Steaming?
Did you know ideal steamed milk should reach about 150°F? This temperature creates that silky milk texture you crave. Mastering various steaming techniques can elevate your coffee game and give you that café-quality experience at home.
Is Steaming Milk Safe in a Microwave?
Steaming milk in a microwave's generally safe, but you should use caution. Employing proper steam techniques can prevent scalding. Always cover the container loosely to allow steam to escape, ensuring a safer experience.
Can I Reuse Steamed Milk for Later?
Imagine prepping for a cozy evening with friends. You can reuse steamed milk, but proper milk storage's essential. When reheating, do it gently to preserve texture and flavor—enjoy your drinks without compromising quality!