To replace your coffee maker's heating element, first unplug the device to guarantee safety. Gather tools like screwdrivers and a multimeter. Remove the outer casing to access the heating element, checking for any mineral buildup. Disconnect the faulty element with wire cutters and replace it with a new one, securing connections with electrical tape. Reassemble the coffee maker, and test it to verify proper function. Follow these steps closely, and you'll uncover more essential maintenance tips.
Understanding the Heating Element
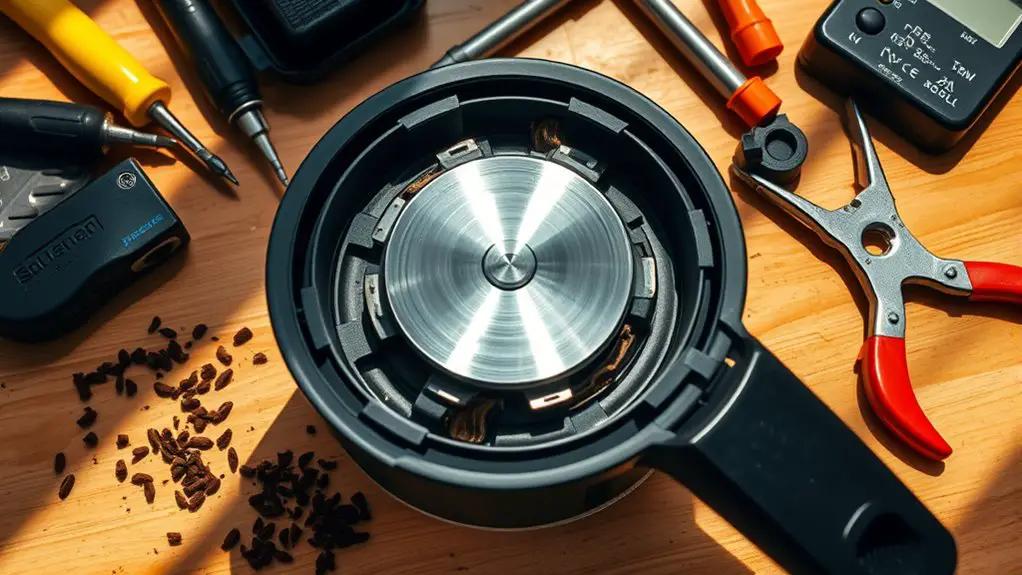
The heating element is the core component that transforms electrical energy into heat, allowing your coffee maker to brew your favorite cup of joe. Understanding heating element basics is vital for maintaining peak performance. Usually, it's a metal coil or plate that heats up when electricity flows through it. Common issues include overheating, which can lead to burnt coffee, or failure to heat at all, resulting in cold brews. If you notice inconsistent brewing temperatures or strange odors, the heating element might be on the fritz. Regularly checking for mineral buildup can also prevent premature failure. By knowing how this essential part operates, you can better troubleshoot and guarantee your coffee maker provides a consistently satisfying experience.
Tools and Materials Needed
When tackling the replacement of a coffee maker's heating element, having the right tools and materials on hand is crucial for a smooth process. First, gather a screwdriver set—both Phillips and flathead will be necessary to access the heating element. You'll also need wire cutters and a multimeter for testing electrical connections. Replacement heating elements can often be found online or at appliance repair shops, so verify you have the correct model. Additionally, keep some electrical tape handy for securing connections. Familiarizing yourself with common issues, like inconsistent brewing temperatures, can help you troubleshoot effectively. With these tools ready, you'll be well-equipped to handle the task at hand.
Safety Precautions
Before you start replacing the heating element in your coffee maker, it's essential to prioritize safety to prevent accidents and injuries. Different heating element types may have specific risks, so understanding these is critical for electrical safety. Follow these safety precautions:
- Unplug the Coffee Maker: Always disconnect the power source before beginning any work.
- Use Insulated Tools: Confirm your tools are insulated to prevent electrical shock.
- Avoid Water Contact: Keep your workspace dry and free of liquids to reduce the risk of short circuits.
- Wear Safety Gear: Use gloves and safety glasses to protect yourself from sharp edges and potential electrical hazards.
Step-by-Step Replacement Process
Before you start the replacement process, make certain you've reviewed your safety precautions thoroughly. Next, gather the necessary tools, including a screwdriver and a multimeter, to guarantee a smooth and efficient replacement. With these preparations in place, you'll be ready to proceed with the step-by-step instructions.
Safety Precautions First
Although replacing a coffee maker's heating element can be a straightforward task, it is vital to prioritize safety throughout the process. By taking the right precautions, you can minimize the risk of electrical hazards. Here are some essential safety measures to follow:
- Unplug the coffee maker before starting any work to eliminate power supply.
- Wear personal protective equipment, such as gloves and safety goggles, to protect yourself from sharp edges and electrical components.
- Use insulated tools to prevent any accidental electrical contact while handling wires.
- Work in a dry area to reduce the risk of electrical shock and guarantee ideal safety conditions.
Tools Needed for Replacement
Having the right tools at your disposal is essential for a successful heating element replacement in your coffee maker. First, gather basic maintenance tools like a screwdriver set, pliers, and wire cutters. Depending on the heating element types—like aluminum or stainless steel—you might need specific wrenches for a secure fit. A multimeter is also vital for testing electrical connections before and after the replacement. Additionally, have a clean workspace ready to keep screws and small parts organized. Finally, consider using heat-resistant gloves for added safety when handling the heating element. With these tools in hand, you're well-equipped to tackle the replacement process confidently and effectively, ensuring your coffee maker operates at peak performance.
Testing Your Coffee Maker
When testing your coffee maker, it's essential to verify that all components are functioning correctly before attempting any repairs, such as replacing the heating element. Follow these steps to guarantee your coffee maker is ready for peak performance:
- Check the Power Source: Confirm it's plugged in and the outlet is functional.
- Inspect the Water Reservoir: Verify it's filled to the appropriate level for brewing.
- Test the Brewing Temperature: Brew a cycle and use a thermometer to measure the temperature; ideal brewing temperature should be around 195-205°F for maximum coffee quality.
- Listen for Sounds: Pay attention for unusual noises indicating a malfunction.
Maintenance Tips for Longevity
To guarantee your coffee maker remains in peak condition for years to come, regular maintenance is essential. Start by cleaning your machine monthly, using a mixture of water and vinegar to descale any build-up. Confirm you replace the water filter as recommended to maintain ideal flavor and performance. Regular descaling not only enhances performance but also preserves coffee flavor, preventing bitter or off tastes.
| Action | Frequency | Benefit |
|---|---|---|
| Clean the exterior | Weekly | Prevents grime buildup |
| Descale with vinegar | Monthly | Enhances efficiency |
| Replace water filter | Every 2-3 months | Improves taste |
Implementing these coffee maker care practices will extend its lifespan and confirm you enjoy every cup. Follow these longevity tips to savor the freedom of perfect coffee whenever you desire.
Frequently Asked Questions
Can I Use a Different Brand's Heating Element for My Coffee Maker?
When considering a different brand's heating element, weigh compatibility concerns and brand variations. You risk improper function or damage, so it's best to stick with the original manufacturer's part for reliable performance and safety.
How Long Does the Replacement Process Typically Take?
The replacement duration for a coffee maker's heating element generally takes about 30 to 60 minutes. Proper coffee maker maintenance guarantees efficiency, so take your time to follow the steps carefully for best results.
What Symptoms Indicate a Heating Element Failure?
Isn't it frustrating when your coffee doesn't brew right? If you notice inconsistent temperatures, burnt coffee, or strange noises, these heating signs indicate potential heating element failure, leading to various coffee issues you shouldn't ignore.
Is It Worth Replacing the Heating Element or Buying a New Coffee Maker?
When considering a cost analysis, weigh the heating element's replacement against a new coffee maker's price. Evaluate longevity comparisons; if the current model's lifespan is short, investing in a new one may offer greater freedom and reliability.
Where Can I Buy a Replacement Heating Element?
When your coffee maker's heart cools, seek out replacement heating elements through online retailers or local appliance stores. They often have essential parts ready to revive your brewing companion, ensuring your morning ritual continues seamlessly.