When your coffee maker's heating element stops working, unplug the machine and gather tools like screwdrivers and a multimeter. Disassemble the coffee maker by removing screws and panels. Identify and detach the old heating element before connecting the new one securely. Reassemble the unit and fill the reservoir for a test run. Keep an eye out for leaks or unusual noises during the cycle. There's more to explore about symptoms and troubleshooting steps if you need further assistance.
Understanding the Symptoms of a Malfunctioning Heating Element
When your coffee maker starts producing lukewarm brews or takes an unusually long time to complete a cycle, it's likely that the heating element is malfunctioning. To identify symptoms more accurately, pay attention to inconsistent brew temperatures and extended brewing times, as these often indicate a failing heating element. Additionally, if you notice unusual noises—such as hissing or clicking—this could signal internal issues. To troubleshoot, first, check that the machine is plugged in and operational. If all connections are secure, consider the possibility of mineral buildup affecting performance; descaling might help. Finally, inspect the power supply and verify the coffee maker's settings are correct. These symptom identification and troubleshooting tips can guide you to a more effective resolution.
Gathering the Necessary Tools and Materials
Before you start replacing the heating element in your coffee maker, it's vital to gather the necessary tools and materials to guarantee the process goes smoothly. You'll need a screwdriver set, preferably Phillips and flathead, to access the internal components. A multimeter is essential for testing the new heating element and ensuring it functions correctly. Don't forget safety gloves to protect your hands from sharp edges and potential burns. You should also have a replacement heating element compatible with your coffee maker model. Finally, gather a small container to hold screws and parts during disassembly. By diligently gathering tools and necessary materials, you'll set yourself up for a more efficient and successful repair process.
Disassembling the Coffee Maker
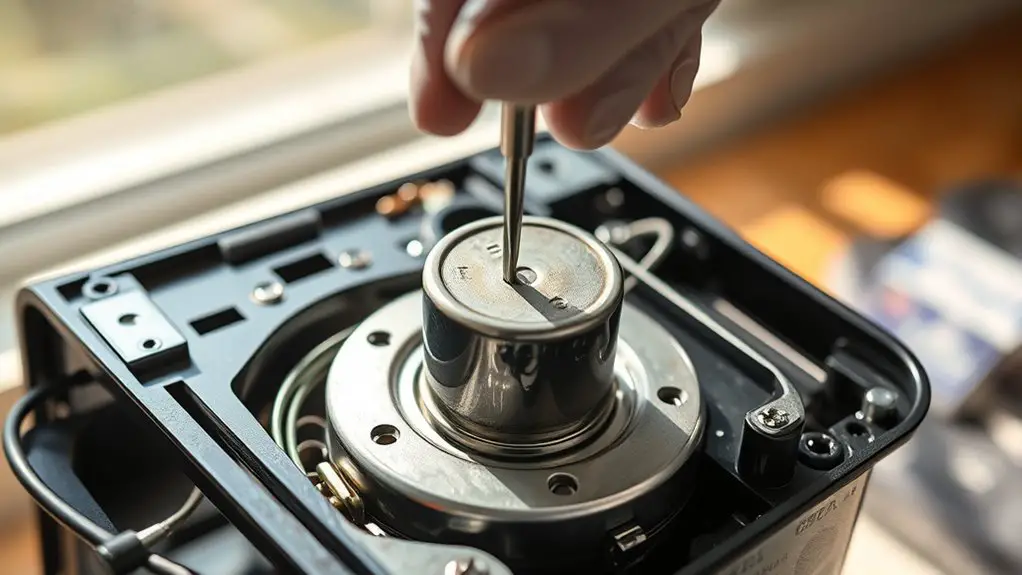
With your tools and materials gathered, you can now begin disassembling the coffee maker. Start by unplugging the device to guarantee safety precautions are observed. Use a screwdriver to remove screws from the base and any removable panels. As you proceed, carefully identify components like the water reservoir, brewing basket, and heating element housing. Document each step or take photos to keep track of the assembly order. If there are clips or latches, gently pry them open to avoid damage. Keep small parts organized in a container to prevent loss. This methodical approach will help you understand the internal structure, making it easier for the next steps in replacing the heating element effectively.
Replacing the Heating Element
Replacing the heating element in your coffee maker is a critical step to restoring its functionality. First, identify the heating element type—either a metal coil or a ceramic plate. Disconnect the power supply and carefully detach the old element, noting its connections. Use troubleshooting tips, like checking for hidden screws or clips, to avoid damaging components. Confirm the replacement element matches the specifications of the original; improper types can lead to inefficiency or failure. Securely connect the new heating element, making sure all wires are tightly fastened. Finally, double-check that everything is in place before reassembling the coffee maker. With precision and attention to detail, you'll have your coffee maker up and running in no time.
Reassembling and Testing Your Coffee Maker
Once you've securely connected the new heating element, it's time to reassemble your coffee maker and verify it functions properly. Begin by using efficient reassembly techniques, making sure all screws and clips are tightened without over-torquing, which could damage components. Reattach the water reservoir and confirm all electrical connections are snug.
Next, plug in the coffee maker and prepare for testing. Implement testing methods by filling the reservoir with water and running a brewing cycle without coffee grounds. Observe for any leaks or unusual noises. If it brews smoothly and heats the water to your desired temperature, you've successfully reassembled your coffee maker. If issues arise, double-check your connections and components before attempting another test.
Frequently Asked Questions
How Long Does a Heating Element Typically Last?
A heating element's lifespan typically ranges from two to five years, depending on usage and maintenance. Common failures occur due to mineral buildup or overheating, so regular cleaning can extend its life and efficiency.
Can I Use a Different Brand's Heating Element?
You can't always use a different brand's heating element due to brand compatibility issues. Mismatched elements may hinder heating efficiency, potentially leading to inadequate performance or damage. Stick to the manufacturer's specifications for best results.
What Safety Precautions Should I Take While Working?
When working on appliances, always wear safety gear like gloves and goggles. Be cautious of electrical hazards; disconnect power before starting. Verify your workspace is dry and well-lit to minimize risks while handling components.
How Can I Troubleshoot Before Replacing the Heating Element?
Before diving into repairs, think of your coffee maker as a puzzle. Check power sources, inspect the cord, and clean the brew basket. These troubleshooting tips can often resolve issues, ensuring smooth coffee maker maintenance.
Is It Worth Repairing or Should I Buy a New Coffee Maker?
When deciding whether to repair or replace, conduct a cost analysis. Consider repair benefits like extended lifespan and reduced waste. If repairs are too costly, investing in a new coffee maker might be the smarter choice.