To fix a Keurig that dispenses too much or too little coffee, start by checking the water reservoir level and ensuring it's correctly seated. Clean the needle assembly to clear any blockages and inspect the K-Cup pod for compatibility and freshness. Run a water-only cycle to flush the system, and consider descaling your machine every 3 to 6 months. Finally, reset your Keurig and adjust brew settings if necessary. There's more to explore for peak performance.
Check the Water Reservoir Level
One of the first things you should do when troubleshooting your Keurig's coffee dispensing issues is to check the water reservoir level. If the water level is low, it can directly impact the coffee consistency, leading to weak or uneven brews. Make certain the reservoir is filled to the minimum line; otherwise, your machine may struggle to extract coffee properly. Also, verify the reservoir is seated correctly, as an improper fit can create air pockets, disrupting water flow. If you notice any debris or buildup around the water reservoir, clean it thoroughly, as this can also affect performance. Keeping the water level adequate is essential for achieving that perfect cup of coffee you desire. Regular maintenance, including identifying the root cause, can help prevent future issues with your machine.
Clean the Needle Assembly
If you notice your Keurig isn't dispensing coffee properly, cleaning the needle assembly might resolve the issue. The needle, which punctures the K-Cup, can get clogged with coffee grounds and residue over time. For effective needle cleaning, use a paperclip or a specialized needle cleaning tool. Carefully insert it into the needle opening and move it around to dislodge any blockages. It's essential to perform regular assembly maintenance to guarantee peak performance. After cleaning, run a water-only brew cycle to flush out any remaining debris. This quick maintenance step can greatly improve your coffee dispensing, allowing you to enjoy your brew without interruption. Don't underestimate the importance of keeping that needle clean for a consistently great cup of coffee! Additionally, regular cleaning can help prevent dirt and mineral deposits that may affect your machine's performance.
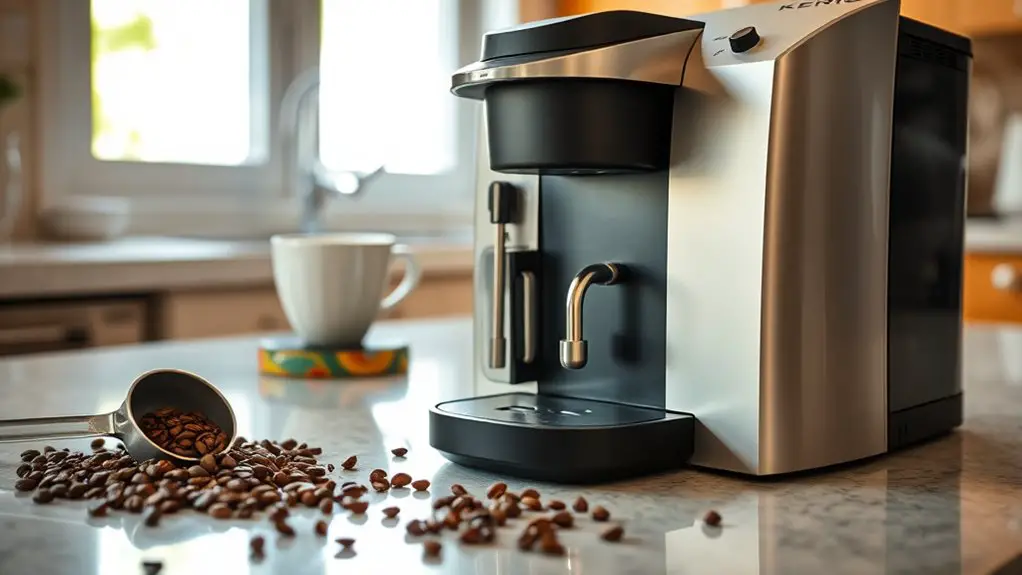
Inspect the K-Cup Pod
Inspecting the K-Cup pod is essential when your Keurig coffee maker isn't dispensing properly. Start by checking for K-cup compatibility; using incompatible pods can lead to brewing issues. Next, examine the pod for freshness—expired or stale pods can affect the flavor and brewing process. Additionally, the freshness of coffee capsules impacts strength and flavor, so it's important to use recently purchased pods for the best results.
| Issue | Solution |
|---|---|
| Incompatible pod | Use the correct K-Cup pod |
| Stale pod | Replace with fresh pod |
| Damaged pod | Inspect for tears or holes |
Run a Water Only Cycle
To address coffee dispensing issues with your Keurig, running a water-only cycle can be an effective troubleshooting step. Start by filling the water reservoir to the maximum level. Confirm there's no K-Cup pod in the holder, then select the largest cup size to initiate the water cycle. This process helps clear any blockages in the water lines caused by coffee residues or mineral buildup. It's a simple yet essential maintenance tip that can restore your machine's performance. After running the cycle, repeat this a couple of times to confirm the system is thoroughly flushed. This quick maintenance task not only enhances the flow but also prepares your Keurig for peak brewing—giving you the freedom to enjoy your coffee without hassle. Regular maintenance, including cleaning the exit needle, is crucial to prevent future brewing issues.
Descale Your Keurig
Descaling your Keurig is essential for maintaining ideal performance and extending its lifespan. You'll need to choose an appropriate descaling solution and follow a specific process to effectively remove mineral buildup. This guide will walk you through the importance of descaling, available solutions, and the necessary steps to complete the task. Regular descaling helps prevent internal clogging or blockage that can disrupt your coffee machine's functionality.
Importance of Descaling
Although you might not realize it, regular descaling is vital for maintaining your Keurig's performance and longevity. The buildup of calcium and mineral deposits can affect your machine's efficiency, leading to inconsistent coffee output.
To maximize your brewing experience, follow the recommended descaling frequency—usually every 3 to 6 months. Here's a quick overview of the descaling benefits:
| Descaling Benefit | Description |
|---|---|
| Improved Flavor | Removes buildup affecting taste |
| Enhanced Speed | Prevents clogging, guaranteeing fast brews |
| Extended Lifespan | Reduces wear on components |
| Consistent Brewing Volume | Guarantees accurate cup sizes |
| Energy Efficiency | Optimizes power usage |
Descaling Solutions Options
Maintaining a clean and efficient Keurig requires selecting the right descaling solution. You've got a few options to evaluate:
- Homemade Descaler: Mix equal parts of white vinegar and water. This natural solution effectively removes mineral buildup without harsh chemicals.
- Commercial Descaler: These products are specifically formulated for coffee machines. They often work faster and may be less abrasive than vinegar, ensuring long-term care for your machine.
- Distilled Water: Regularly using distilled water can help prevent mineral buildup in the first place, prolonging your Keurig's lifespan.
Choosing the right descaling solution can enhance your coffee experience and keep your machine running smoothly. Whether you opt for a homemade or commercial descaler, your Keurig deserves proper care.
Descaling Process Steps
To guarantee your Keurig functions at its best, follow these detailed steps for descaling. Regular descaling, ideally every 3-6 months, enhances performance and prolongs the lifespan of your machine. Here's how to do it:
| Step | Action |
|---|---|
| 1 | Prepare descaling solution. |
| 2 | Fill the water reservoir. |
| 3 | Run a brew cycle without a pod. |
| 4 | Let the machine sit for 30 minutes. |
| 5 | Rinse with fresh water. |
Descaling benefits include improved flavor, consistent brewing temperature, and prevention of clogs. By adhering to this process, you'll ascertain your Keurig remains a reliable source of coffee freedom, delivering the perfect cup every time.
Examine the Brew Size Settings
One key aspect to contemplate when troubleshooting Keurig coffee dispensing issues is the brew size settings. If your machine's output isn't matching your expectations, you might need to make a settings adjustment.
- Check the brew size selection: Verify you've chosen the correct size for your cup; options usually include 6, 8, or 10 ounces.
- Adjust the settings: If the wrong size has been selected, adjust it accordingly. This can greatly affect the brew quality.
- Test multiple sizes: Brew a cup using each size option to identify if a specific setting is causing the issue. Additionally, consider how brew strength control allows you to fine-tune the intensity of your coffee, which can complement the adjustments you make to the brew size.
Test Different K-Cup Brands
While you may have adjusted your brew size settings, the brand of K-Cup you're using can also considerably impact your coffee's flavor and flow. Different brands have varying levels of grind and roast, affecting extraction rates. To find the right fit, test K-Cups from multiple manufacturers.
Here's a quick comparison table to guide your choices:
| K-Cup Brand | Flavor Profile |
|---|---|
| Brand A | Bold and Rich |
| Brand B | Smooth and Mild |
| Brand C | Dark and Intense |
| Brand D | Fruity and Light |
| Brand E | Balanced and Nutty |
Experimenting with K-Cup compatibility can enhance your brewing experience and help you identify brands that suit your taste and flow preferences. Additionally, be aware that caffeine levels can vary significantly between different K-Cup brands, which may further influence your choice.
Replace the Water Filter
If you've tried different K-Cup brands and are still experiencing issues with your Keurig, it might be time to contemplate the water filter. Regular water filter maintenance can greatly impact your machine's performance. Here are some filter replacement tips to keep in mind:
- Change the filter every two months for peak performance.
- Soak the new filter in water for 5 minutes before installation to guarantee proper functionality.
- Rinse the water reservoir thoroughly after replacing the filter to eliminate any residual particles.
Ensure Proper Placement of the K-Cup
Proper placement of the K-Cup is essential for peak brewing performance. If the K-Cup isn't aligned correctly, it can lead to inconsistent coffee dispensing. When you insert the K-Cup, verify it fits snugly and is properly aligned with the brewing needle. This guarantees maximum K-Cup compatibility and prevents leaks or overflow. Additionally, ensuring that the K-Cup is placed correctly can help avoid issues like a clogged needle, which can lead to water leakage.
Here's a quick reference table to help you understand K-Cup alignment:
| K-Cup Position | Alignment Check | Possible Issue |
|---|---|---|
| Centered | Properly seated | Good compatibility |
| Misaligned | Wobbling or loose | Inconsistent brewing |
| Incorrect fit | Doesn't click in place | Might not pierce correctly |
Reset Your Keurig Machine
If your Keurig isn't dispensing coffee, resetting the machine can often resolve the issue. Start by unplugging the unit to reboot it, then check the water reservoir for proper placement and fill levels. Finally, verify your brew settings are correctly configured to get back to brewing your favorite cup.
Unplug and Reboot
One effective troubleshooting step for fixing a Keurig coffee dispensing issue is to unplug and reboot your machine. This simple action can resolve many problems, thanks to the unplugging benefits that help reset internal components. Follow these rebooting techniques for best results:
- Unplug the machine from the outlet.
- Wait at least 10 seconds to guarantee a complete reset.
- Plug the machine back in and turn it on.
Check Water Reservoir
The water reservoir is an essential component of your Keurig machine, and checking it can often resolve dispensing issues. Start by verifying the water level is adequate; if it's too low, your machine may dispense less coffee than expected. Conversely, overfilling can lead to spills and inaccurate measurements. Regular reservoir maintenance is important—remove the tank, clean it thoroughly, and inspect for any damage or blockages. Confirm the reservoir is properly seated in its base, as a misalignment can disrupt water flow. After checking and adjusting the reservoir, try brewing again to see if the problem persists. A well-maintained water reservoir contributes substantially to your machine's overall performance and helps you enjoy that perfect cup of coffee.
Reset Brew Settings
Resetting the brew settings on your Keurig machine can often resolve persistent dispensing issues. By utilizing specific resetting techniques, you can restore your brew preferences and enjoy your coffee without hassle. Here's how to reset your settings:
- Turn Off the Machine: Unplug your Keurig for at least 5 minutes to guarantee a complete reset.
- Replug and Power On: Plug the machine back in and power it on. Wait for it to fully heat up.
- Select Brew Size: Choose your desired brew size to confirm the settings are restored.
Following these steps should help recalibrate your machine, allowing it to dispense the right amount of coffee again. Enjoy your perfectly brewed cup!
Frequently Asked Questions
Can I Use Regular Coffee Grounds Instead of K-Cups?
You can use regular coffee grounds instead of K-Cups, but be mindful of coffee ground types. Different brewing methods may require adjustments in grind size for ideal extraction and flavor in your cup.
How Often Should I Clean My Keurig?
You should clean your Keurig every three to six months for peak performance. Regular maintenance tips include descaling, removing mineral buildup, and washing removable parts, ensuring your machine brews delicious coffee consistently and efficiently.
What Should I Do if My Keurig Won't Turn On?
If your Keurig won't turn on, start with basic troubleshooting. Check the power cord and outlet for issues. If those are fine, consider resetting the machine or looking into internal power issues for further assistance.
Is It Normal for My Keurig to Make Noise?
It's normal for your Keurig to make noise during brewing. The brewing sounds are caused by water heating and pressurizing. If the noise seems excessive, you might want to check for any blockages or maintenance needs.
Can I Use Flavored Water in My Keurig?
You might wonder if flavored water can enhance your brew. While it's tempting, using flavored water in your Keurig isn't recommended. Stick to water for ideal performance and flavor. Check brewing tips for best results.