To repair your broken coffee grinder, first identify issues like inconsistent grind size or unusual noises. Gather essential tools such as screwdrivers and a multimeter for inspections. Always guarantee safety by unplugging the machine and wearing protective gear. Disassemble the grinder, clean components, and check for damage to burrs or the motor. Replace any worn parts before reassembling and testing for functionality. You'll discover more tips to guarantee your grinder runs efficiently.
Identifying Common Coffee Grinder Issues
When you're troubleshooting your coffee grinder, it's vital to recognize the most common issues that can arise. Start by checking for inconsistent grind size, which can indicate dull blades or improper settings. If your grinder's motor runs but doesn't grind, it may be jammed with beans or debris, requiring a thorough cleaning. Another common issue is overheating; if the grinder shuts off unexpectedly, let it cool down before resuming use. Additionally, listen for unusual noises, which can signal wear in the motor or internal components. Finally, if you're experiencing issues with the power supply, inspect the cord and plug for damage. These troubleshooting tips will help you pinpoint and resolve these prevalent issues effectively. Also, ensure that the grinder's safety clutch is functioning correctly, as a malfunction can prevent proper grinding.
Gather Necessary Tools and Materials
Before you begin repairing your coffee grinder, it's essential to gather the right tools and materials to guarantee a smooth process. Start with a flathead and Phillips screwdriver for disassembly. You'll also need a set of pliers for gripping small components. For coffee grinder maintenance, a soft brush or vacuum can help clean the grinder chamber effectively. Additionally, stock up on replacement parts, such as burrs or gaskets, relevant to your model. A multimeter can be invaluable for espresso machine troubleshooting if electrical issues arise. Finally, make sure you have a clean workspace to keep your tools organized and minimize the risk of losing small parts. With everything ready, you'll be well-equipped to tackle your coffee grinder repair.
Safety Precautions Before Starting the Repair
Before starting the repair, verify the espresso machine is unplugged to prevent any electrical hazards. It's also essential to wear protective gear, like gloves and safety goggles, to shield yourself from potential injuries. Finally, be cautious around sharp edges to avoid cuts while handling the grinder components.
Unplug the Espresso Machine
To guarantee your safety while repairing the espresso machine, always unplug it from the power source first. This essential step minimizes the risk of electric shock and guarantees that the machine is completely inactive during your repair process. Employ effective unplugging techniques, such as grasping the plug firmly and pulling it straight from the outlet to avoid damaging the cord. Double-check that any indicator lights are off before proceeding. Machine safety relies heavily on these precautions; without them, you could inadvertently activate the grinder or other components. Taking this simple yet important step not only protects you but also prolongs the lifespan of your espresso machine by preventing electrical damage during repairs. Prioritize safety, and enjoy your freedom to repair confidently.
Wear Protective Gear
Safety gear is essential when repairing a coffee grinder, as it protects you from potential hazards. Before you engage in the repair, put on protective gloves to shield your hands from sharp components and debris. This simple step can prevent cuts and scrapes that might occur during the process. Next, don safety goggles to safeguard your eyes from any flying particles or small parts that might dislodge while you're working. These precautions aren't just about compliance; they empower you to focus on the task at hand without worrying about injuries. By equipping yourself with the right protective gear, you can confidently tackle the repair, ensuring a safer and more efficient experience overall. Don't skip this vital step!
Avoid Sharp Edges
Sharp edges are a common hazard when repairing a coffee grinder, and it's crucial to handle them with care. To guarantee your safety, start by identifying any potential sharp edges on the grinder components. Use tools designed for sharp edge prevention, like rubber-coated pliers or screwdrivers with padded handles, to minimize the risk of cuts. Always keep your fingers away from cutting surfaces, and if necessary, use a cloth to shield your hands while working. Remember to follow grinder safety tips, like working in a well-lit area and maintaining a clutter-free workspace. By taking these precautions, you can protect yourself while effectively repairing your coffee grinder, allowing you the freedom to enjoy your espresso without worry.
Disassembling Your Espresso Machine
Before you start disassembling your espresso machine, gather the necessary tools to guarantee a smooth process. You'll follow a step-by-step disassembly process, which is essential for avoiding damage. Remember to take into account safety precautions throughout to protect both yourself and the machine.
Necessary Tools Required
To successfully disassemble your espresso machine, you'll need a few essential tools at your disposal. First, grab a set of precision screwdrivers, including Phillips and flathead types, to tackle various screws. A pair of pliers will help you handle stubborn components. For safe removal of parts, a soft cloth or mat is vital to prevent scratches. You'll also want a small brush to clear any coffee residue during coffee grinder maintenance. Finally, having a multimeter on hand can be beneficial for espresso machine troubleshooting, allowing you to check electrical components. With these tools, you'll be well-equipped to engage in the disassembly process, ensuring a smooth and efficient repair experience.
Step-by-Step Disassembly Process
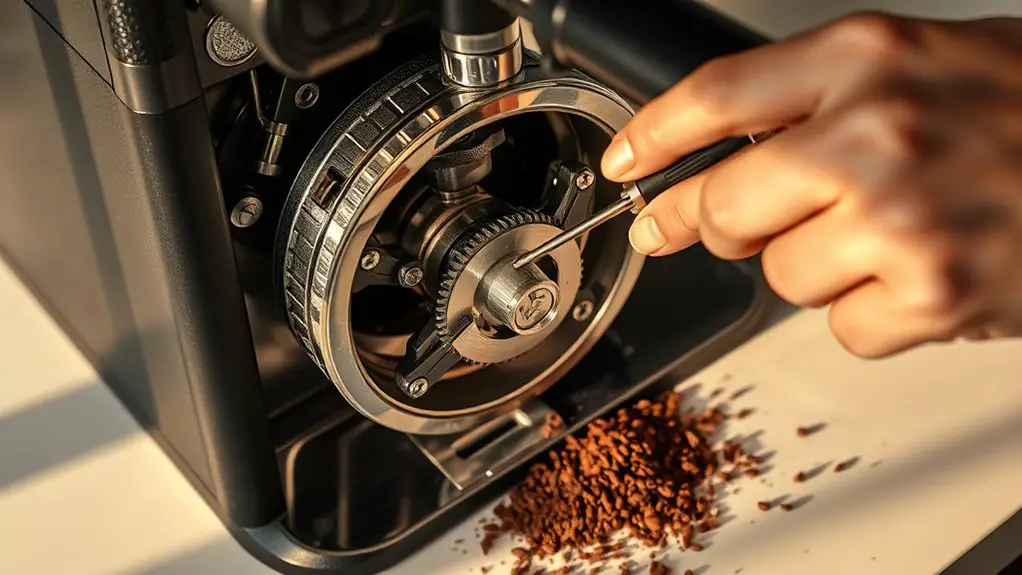
Disassembling your espresso machine involves a systematic approach to guarantee each component is accessed and handled properly. Start by unplugging the machine and removing any external parts, such as the water reservoir and drip tray. Utilize appropriate disassembly techniques to unscrew and detach the grinder assembly, ensuring you keep track of the screws and parts. Carefully detach the grinding burrs, taking note of their orientation for reassembly. Clean each component thoroughly as part of your grinder maintenance routine. Inspect for wear or damage, replacing any faulty parts before reassembly. Once you've cleaned and checked all components, reverse the disassembly steps, ensuring everything fits snugly. This methodical process will help maintain your espresso machine's longevity and performance.
Safety Precautions to Consider
Assuring your safety while disassembling your espresso machine is paramount, particularly when working with electrical components and sharp objects. Before you start, wear appropriate safety gear, including gloves and goggles, to protect against cuts and debris. Always unplug the machine to eliminate electrical hazards, reducing the risk of accidental shocks. Familiarize yourself with the internal components and their connections to avoid damaging them during disassembly. Use insulated tools to prevent any risk of electrical contact. Keep your workspace organized to prevent accidents and assure that small parts don't get lost. If you encounter any resistance while disassembling, stop and reassess rather than forcing components apart. Prioritize caution, and you'll maintain both your safety and the integrity of your espresso machine.
Inspecting and Cleaning the Grinder Components
Before diving into repairs, it's crucial to inspect and clean the grinder components to guarantee maximum performance. Start by unplugging your espresso machine and removing the hopper. Check for any coffee residue or oils that could hinder operation. Use a soft brush to dislodge particles, focusing on burrs and the grinding chamber. For thorough cleaning, consider a damp cloth to wipe down surfaces, but avoid excess moisture. Implementing these grinder maintenance tips not only improves flavor but also extends the lifespan of your machine. Cleaning frequency recommendations suggest doing this every few weeks, or more often if you grind daily. Regular inspection guarantees you catch wear and tear early, preventing larger issues down the line. Additionally, clean equipment is universally recommended by baristas and coffee roasters to maintain optimal performance.
Replacing Worn or Damaged Parts
As you identify worn or damaged parts in your coffee grinder, timely replacement is essential to maintain peak performance. Start by sourcing parts from reputable suppliers. Verify the replacements match your grinder's specifications for maximum functionality. Regular cleaning and maintenance can also help in prolonging the life of your grinder.
| Part | Signs of Damage | Identifying Replacements |
|---|---|---|
| Burrs | Uneven grind, noise | Check size and material |
| Motor | Overheating, stalling | Match voltage, wattage |
| Hopper | Cracks, improper fit | Verify dimensions |
Once you've pinpointed the replacements, consult your espresso machine's manual for compatibility. This precision guarantees your grinder operates effectively, allowing you the freedom to craft the perfect espresso without compromising quality.
Reassembling the Espresso Machine
Once you've successfully replaced any worn or damaged parts, reassembling your espresso machine requires careful attention to detail. Begin by organizing all components and referring to your service manual for guidance. Use effective reassembly techniques, like aligning parts precisely and tightening screws in a diagonal pattern to guarantee even pressure. Pay special attention to seals and gaskets; they must fit snugly to prevent leaks. Reconnect the electrical components securely, avoiding any pinched wires. As you proceed, remember these maintenance tips: regularly inspect each part during reassembly, and apply a light lubricant where necessary. Once everything's in place, double-check your work before proceeding to the next steps. This diligence will guarantee your machine runs smoothly and efficiently.
Testing Your Coffee Grinder After Repair
After reassembling your espresso machine, it's important to verify that your coffee grinder operates correctly. Begin by conducting a grinder performance analysis. Test the grind consistency by processing a small batch of coffee beans. Observe the grind size closely and confirm it's uniform. If the results are unsatisfactory, apply specific troubleshooting techniques to identify issues such as clogs or misalignments.
Here's a quick checklist for testing:
| Test | Expected Outcome |
|---|---|
| Grind Consistency | Uniform particle size |
| Motor Functionality | Smooth, noise-free operation |
| Bean Feed Rate | Steady flow |
| Final Brew Quality | Rich, balanced flavor |
Frequently Asked Questions
Can I Use a Regular Grinder Instead of an Espresso Grinder?
Using a regular grinder's like trying to fly a brick! It just won't work. For espresso, you need that grind consistency. Regular grinder performance can't match the precision needed for perfect espresso extraction.
How Long Does a Typical Coffee Grinder Last?
A typical grinder lifespan ranges from 5 to 10 years, depending on usage and maintenance. To extend its life, follow maintenance tips like regular cleaning and avoiding overload, ensuring your grinder remains efficient and reliable for your brewing needs.
What Type of Coffee Beans Are Best for Espresso?
Did you know that over 50% of espresso aficionados prefer Arabica beans? For ideal taste, experiment with espresso bean varieties like Arabica and Robusta, while maintaining a fine grind size to enhance extraction and flavor.
Is It Safe to Use a Wet Cloth for Cleaning?
Using a wet cloth isn't recommended for cleaning techniques, as moisture can damage sensitive components. Instead, follow maintenance tips like using a dry microfiber cloth to guarantee your equipment stays in ideal condition.
When Should I Consider Replacing My Espresso Machine?
You should consider replacing your espresso machine when its lifespan exceeds 10 years, or when you notice significant performance issues, persistent leaks, or strange noises. These signs often indicate it's time for an upgrade.