If your Keurig isn't dispensing water, start by checking the water reservoir to make certain it's full and properly aligned. Inspect the water line for clogs and clean the needle above the K-cup holder. Descale your machine regularly to prevent buildup and confirm it's plugged in with a working outlet. If you've replaced the water filter recently, you're set. If these tips don't resolve the issue, there are more solutions you might find helpful.
Check the Water Reservoir
One of the first things you should do is check the water reservoir. If it's empty or low, that could be your issue. Confirm that the water you're using is of good quality, as impurities can affect the brewing process. Regularly clean the reservoir to maintain peak water quality—this simple maintenance tip can prevent clogs and buildup. Also, check for any leaks or cracks in the reservoir; even a small issue can impact performance. Make it a habit to inspect the reservoir often, as this proactive approach can save you time and frustration down the line. By keeping the water reservoir in top shape, you'll enjoy a seamless brewing experience and delicious coffee every time. Additionally, ensure the reservoir is properly aligned with the machine, as misalignment can lead to dispensing issues.
Inspect the Water Line
If your Keurig isn't dispensing water, it's time to inspect the water line. Check for any clogs that might be blocking the flow and guarantee that all connections are secure. Don't forget to take a look at the water reservoir to confirm it's properly seated and functioning. Additionally, ensure that there are no clogged needles which can also impede water flow.
Check for Clogs
A clogged water line can be the culprit behind your Keurig not dispensing water properly. First, disconnect your machine and inspect the water line for any visible debris or buildup. A simple cleaning can often resolve the issue. Regular maintenance tips include flushing the water line with a vinegar solution to prevent future clogs. If you notice any persistent blockages, consider using a soft brush or pipe cleaner to clear the line gently. Remember, clog prevention is key; always use filtered water and clean your machine regularly to guarantee a smooth brewing experience. By keeping your water line clear, you'll enjoy your favorite brews without interruption!
Ensure Proper Connection
Guaranteeing a proper connection is essential for your Keurig to function correctly. If the water line isn't connected firmly, it can disrupt your coffee brewing experience. Start by checking the water line for any visible signs of damage or loose connections. A secure connection guarantees that water flows smoothly, allowing you to enjoy your coffee without interruptions. Here are some maintenance tips to keep in mind:
| Connection Status | Action Needed |
|---|---|
| Secure | No action needed |
| Loose | Tighten the connection |
| Damaged | Replace the water line |
| Blocked | Clear any obstructions |
| Leaking | Inspect and seal leaks |
Taking these steps can enhance your coffee brewing routine, giving you the freedom to savor each cup.
Inspect Water Reservoir
Inspecting the water reservoir is essential since any issues here can prevent your Keurig from dispensing water properly. Start by checking for any clogs or debris that might be affecting water flow. Confirm the reservoir is seated correctly and that the water line is clear. Poor water quality can lead to mineral build-up, so consider regularly cleaning the reservoir to maintain peak performance. Use a mixture of vinegar and water for thorough reservoir maintenance. Additionally, inspect the water line for any kinks or blockages that could disrupt the flow to your machine. By keeping an eye on these elements, you can enjoy a hassle-free brewing experience and confirm your Keurig runs smoothly.
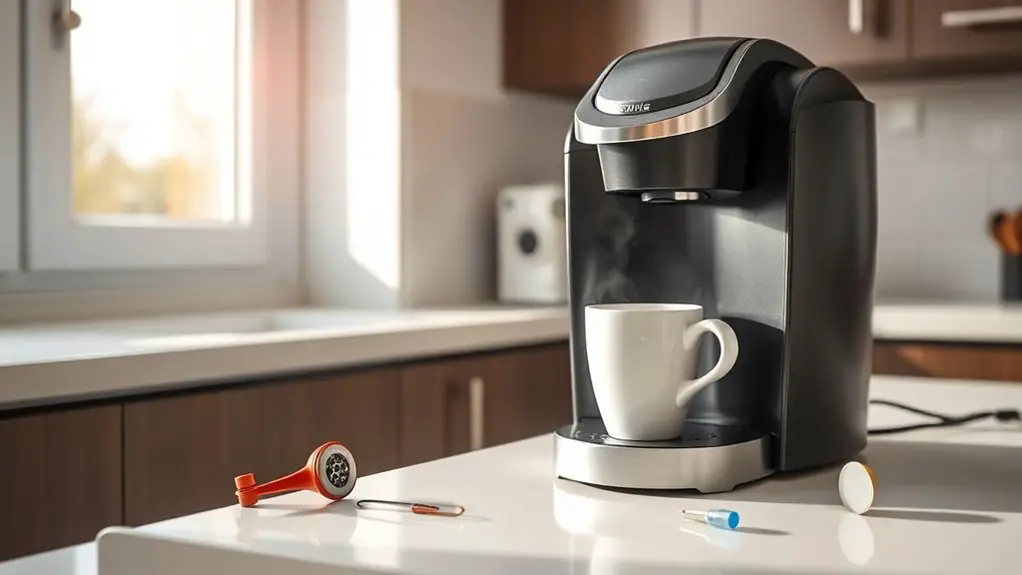
Clean the Needle
Cleaning the needle is an essential step in getting your Keurig back to its best performance. Regular needle maintenance not only prevents clogs but also guarantees brewing efficiency. Here's a quick guide to help you:
| Step | Description | Importance |
|---|---|---|
| Gather Supplies | Use a paperclip or needle tool | Necessary for cleaning |
| Locate the Needle | Find it above the K-cup holder | Target the clogging source |
| Clean the Needle | Insert and gently scrape | Restores peak flow |
Additionally, neglecting to clean the needle can lead to bacterial growth that may affect your health and the quality of your coffee.
Descale the Machine
If your Keurig isn't dispensing water, descaling the machine might be the solution you need. Over time, mineral buildup can clog your system, leading to frustrating issues. To tackle this, gather a descaling solution specifically designed for coffee machines. You can find these in stores or online.
Start by emptying the water reservoir and adding the descaling solution mixed with water, as per the instructions. Run a brewing cycle without a pod, allowing the solution to flow through the machine. Afterward, rinse the reservoir and run several cycles with fresh water to eliminate any residue. Regularly performing the descaling procedure can prevent future clogs and maintain optimal performance.
Following these maintenance tips regularly can help keep your Keurig running smoothly, ensuring you enjoy that perfect cup of coffee without hassle.
Ensure Proper Power Supply
Power issues can often be the culprit when your Keurig isn't dispensing water. To guarantee your machine is getting the right power supply, here are a few steps you can take:
- Check the Outlet: Make sure the outlet works by plugging in another device.
- Inspect the Power Cord: Look for any visible damage or fraying that could indicate wiring issues.
- Reset the Circuit Breaker: If you suspect a power surge, reset the breaker to restore power to the outlet.
- Use a Surge Protector: Protect your Keurig from future power surges by plugging it into a surge protector. Additionally, ensure that the water reservoir is properly seated to prevent the machine from displaying an "add water" alert due to improper installation of the water tank.
Reset the Machine
Sometimes, a simple reset can resolve issues with your Keurig not dispensing water. To start, unplug your machine and let it sit for about 30 seconds. This reset technique often clears minor glitches. After that, plug it back in and power it on. If the problem persists, try holding down the brew button for a few seconds while the machine is on; this can help reset the internal system. Additionally, check for any error messages that might guide your troubleshooting methods. If you see any, consult your user manual for specific instructions. Remember, a reset can be a quick and effective way to get your Keurig back in action, enjoying your favorite brews again in no time.
Replace the Water Filter
To keep your Keurig brewing great-tasting coffee, it's crucial to use clean water, and that starts with a fresh water filter. You should replace the filter regularly to guarantee peak performance and flavor. Let's go over the proper steps for installation to get your machine back in top shape.
Importance of Clean Water
Clean water is essential for brewing that perfect cup of coffee, and replacing the water filter in your Keurig is an important step in maintaining the quality of your beverage. Using clean water directly impacts the flavor and overall enjoyment of your coffee. Here are some reasons why it matters:
- Enhances Flavor: Clean water improves the taste, allowing you to savor the full richness of your coffee.
- Promotes Hydration Benefits: Staying hydrated is essential, and quality water helps you achieve that.
- Prevents Build-Up: A fresh filter reduces mineral deposits, ensuring smooth operation.
- Extends Machine Life: Regularly changing the filter can prolong the life of your Keurig, saving you time and money in the long run.
Filter Replacement Frequency
Replacing your water filter regularly is essential for keeping your Keurig in top shape. The filter lifespan typically ranges from two to three months, depending on your usage. Be on the lookout for replacement indicators, such as a change in water taste or slower brewing times.
Here's a handy reference table for filter replacement:
| Usage Frequency | Filter Lifespan | Replacement Indicators |
|---|---|---|
| Daily (multiple cups) | 2 months | Noticeable taste change |
| Weekly | 3 months | Slower brew time |
| Monthly | 4 months | Filter light is on |
Proper Installation Steps
Before you can enjoy your favorite brew again, it's crucial to guarantee the water filter is installed correctly in your Keurig. Follow these simple steps for proper Keurig installation:
- Remove the old filter: Take out the used water filter from the water reservoir.
- Soak the new filter: Soak your new water filter in water for about 5 minutes to activate it.
- Install the filter: Place the soaked filter into the filter holder, ensuring it's secure.
- Reattach the reservoir: Put the water reservoir back onto the Keurig, connecting it firmly to the water line.
Contact Customer Support
If you've tried the common troubleshooting steps and your Keurig still isn't dispensing water, it might be time to reach out for professional help. Customer service can provide you with specific troubleshooting tips tailored to your model. They've got the expertise to diagnose issues that you might not be able to resolve on your own.
Here's a quick reference table to help you when contacting support:
| Aspect | Details |
|---|---|
| Contact Method | Phone, Email, Live Chat |
| Information Needed | Model Number, Purchase Date |
| Hours of Operation | Varies by region |
| Warranty Status | Check before contacting |
Don't hesitate to seek assistance; your coffee freedom is worth it!
Frequently Asked Questions
Can I Use Bottled Water in My Keurig?
Using bottled water in your Keurig can enhance your coffee's taste. For instance, if you're worried about water quality concerns, bottled water benefits include purity and flavor, making your brew more enjoyable and satisfying.
How Often Should I Clean My Keurig?
You should clean your Keurig every three to six months for ideal performance. Regular maintenance tips include descaling and rinsing the water reservoir, ensuring your machine brews great coffee while prolonging its lifespan.
What if My Keurig Makes Noise but Doesn't Dispense?
When the pot's boiling, it's time to check your Keurig! If you hear noise but it isn't dispensing, try some Keurig troubleshooting. Blockages or pump issues could be causing those noise issues you're experiencing.
Is It Normal for My Keurig to Take Time to Heat Water?
Yes, it's normal for your Keurig to have a heating time. It guarantees the water temperature is just right for brewing. Patience pays off, as a properly heated brew enhances your coffee experience considerably.
Does My Keurig Need Special Filters?
Your Keurig doesn't necessarily need special filters, but using the right filter types can improve water quality. It helps reduce impurities, enhancing the taste of your coffee and extending your machine's lifespan.