If your coffee maker's brewing basket is broken, first inspect it for cracks or warping. Make certain it fits securely without gaps. Clean any clogs with warm soapy water or vinegar, then rinse thoroughly. If damage persists, replace the basket with a compatible one using the right materials for your machine. Regular maintenance is essential to prevent future issues. For a deeper understanding of troubleshooting and repair techniques, you can explore further information on this topic.
Identifying the Problem With Your Brewing Basket
How can you tell if your brewing basket is the source of your coffee maker's issues? First, examine the brewing basket types compatible with your specific coffee maker brands. If you notice uneven extraction or weak flavor, the basket may not be securing properly, allowing grounds to escape. Check for any blockages or cracks. Additionally, if your coffee maker is leaking, inspect the basket's seal; a faulty fit can cause overflow. If you're using a reusable basket, verify it's clean and free from oil buildup, which can affect performance. Finally, assess if you've inserted the basket correctly; improper placement can hinder functionality. Identifying these factors will help you determine if the brewing basket is indeed the culprit behind your coffee maker's problems. Furthermore, ensure the brew basket issues are addressed, as they are a common cause of leaks in Cuisinart coffee makers.
Common Issues That Cause Brewing Basket Malfunctions
While brewing baskets are designed for ideal coffee extraction, several common issues can lead to malfunctions that affect performance. One frequent problem is improper fit, especially with various brewing basket types; if the basket doesn't sit correctly, it can cause leaks or inconsistent brewing. Clogs are another major culprit, often caused by coffee grounds accumulating in the filter or the basket itself, obstructing water flow. Additionally, wear and tear from frequent use can weaken the material, resulting in cracks or breaks. Finally, incorrect assembly after cleaning can prevent the basket from functioning properly. By recognizing these common malfunction causes, you can take steps to address the issues and guarantee your brewing basket works effectively. Regular maintenance can also help prevent clogged coffee maker issues that lead to brewing inconsistencies.
Tools You'll Need for the Repair
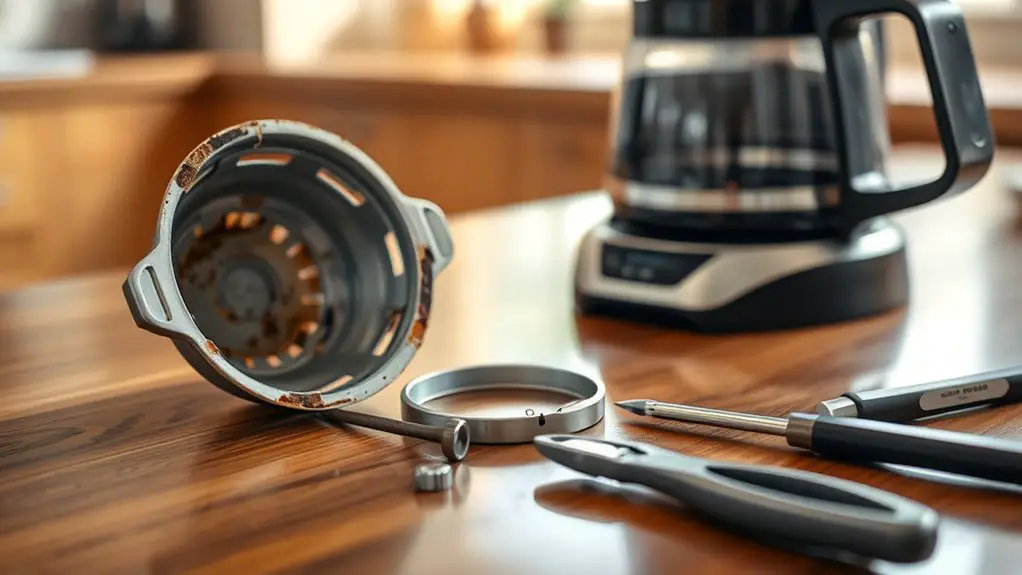
Before you start repairing your coffee maker, it's essential to gather the right tools to guarantee a smooth process. Here's a concise list of what you'll need:
| Tool | Purpose | Recommended Types |
|---|---|---|
| Screwdriver | Remove screws from the casing | Phillips, Flathead |
| Pliers | Grip and manipulate small parts | Needle-nose, Slip-joint |
| Cleaning Materials | Remove debris and clogs | Vinegar, Cloth, Brush |
| Replacement Parts | Fix the brewing basket | OEM or compatible parts |
Having the appropriate screwdriver types and cleaning materials on hand makes the repair more straightforward. This preparation allows you to tackle the issue with confidence and efficiency.
Step-by-Step Guide to Inspecting the Brewing Basket
With the necessary tools at your disposal, you can now proceed to inspect the brewing basket—a common source of issues in coffee makers. First, remove the brewing basket and examine its materials, typically plastic or stainless steel. Check for any cracks, warping, or discoloration that could impede function. Next, assess the brewing basket designs; some have integrated filters or unique shapes that may affect water flow. Verify the basket fits securely in the coffee maker without gaps. Look for any clogs or debris that may compromise the brewing process. Finally, confirm that all components align correctly, allowing for peak performance. This thorough inspection sets the stage for the next steps in your repair process.
Cleaning the Brewing Basket: A Quick Fix
Cleaning the brewing basket is essential for maintaining perfect coffee flavor and machine performance. To guarantee peak function, start by detaching the brewing basket from the coffee maker. Use warm, soapy water and a soft brush to scrub away any coffee oils or residue. Rinse thoroughly to prevent soap residue from affecting your brew.
For stubborn stains, consider using vinegar as a natural cleaning agent. Soak the basket in a solution of equal parts vinegar and water for about 30 minutes, then scrub and rinse. Regularly incorporating these cleaning techniques into your maintenance tips can extend the lifespan of your coffee maker, as regular maintenance is essential for enhancing the machine's performance and lifespan. By keeping the brewing basket clean, you'll enjoy flavorful coffee and reliable machine performance for years to come.
Adjusting the Brewing Basket for Proper Fit
To guarantee peak performance, you need to inspect the brewing basket's alignment carefully. Adjust the basket height securely to prevent any gaps that could affect water flow. Finally, test the brewing cycle to confirm that the adjustments enhance the overall effectiveness of your coffee maker.
Inspect Brewing Basket Alignment
Making sure the brewing basket is properly aligned is essential for peak coffee extraction and machine performance. Misalignment can lead to uneven brewing, affecting flavor and strength. Start by inspecting the brewing basket position within the coffee maker. Check for any obstructions or debris that may be causing misalignment.
| Component | Position | Notes |
|---|---|---|
| Brewing Basket | Level & Centered | Verify it sits flat |
| Retaining Clips | Securely Fastened | Confirm they hold basket firmly |
| Coffee Grounds | Evenly Distributed | Avoid clumping or gaps |
Regular coffee maker maintenance includes this inspection. Address alignment issues promptly to maintain peak performance and a delightful cup of coffee.
Adjust Basket Height Securely
While it may seem minor, adjusting the basket height securely is crucial for ideal brewing performance. Proper basket stability guarantees your coffee maker functions effectively, preventing leaks and guaranteeing an even extraction. Follow these steps for a secure fitting:
- Check for alignment: Make sure the brewing basket sits evenly within its holder.
- Adjust height: If the basket is too low or high, reposition it until it locks in place.
- Test for stability: Gently shake the basket; it should remain firmly in position without any wobble.
Test Brewing Cycle Effectiveness
After you've securely adjusted the basket height, it's vital to test the brewing cycle effectiveness to confirm peak performance. Begin by filling the water reservoir to the appropriate level and adding coffee grounds to the basket. Start the brewing cycle and observe the flow of water through the basket. Verify that water evenly saturates the coffee grounds without overflow or blockage. If you notice uneven extraction or weak coffee, you may need to further adjust the basket's position or check for obstructions. After the cycle completes, evaluate the flavor and strength of the coffee. This final test will confirm the adjustments made are ideal, verifying your coffee maker brews efficiently and delivers that desired cup of coffee.
When to Replace the Brewing Basket
If you notice signs of damage, such as cracks or warping, it's time to contemplate replacing your brewing basket. Additionally, decreased brewing quality, like weak coffee or excessive sediment, can indicate that the basket is no longer functioning properly. Finally, verify compatibility with your coffee maker; a mismatched brewing basket can lead to further issues.
Signs of Damage
The brewing basket is an essential component of your coffee maker, and recognizing its signs of damage can prevent poor brewing performance and potential contamination. Regular brewing basket care is vital, as wear can affect your coffee's taste and quality. Here are some signs you should watch for:
- Cracks or Breaks: Any visible damage can lead to leaks and uneven brewing.
- Discoloration: Stains or fading indicate a breakdown of materials, affecting performance.
- Warping: A misshapen basket won't hold coffee grounds properly, compromising your brew.
If you notice any of these signs of wear, it's time to replace your brewing basket. Addressing these issues promptly guarantees you continue enjoying a clean and flavorful cup of coffee.
Brewing Quality Issues
How can you tell when your brewing basket needs replacing due to quality issues? If you notice inconsistent brewing temperatures, it's a clear sign your basket may be failing. A malfunctioning basket can lead to improper water flow, affecting how your coffee grounds interact with water. This disrupts flavor extraction, often resulting in weak or overly bitter coffee. If your brew tastes off or weaker than usual, check the basket for clogs or damage. Additionally, if the basket shows signs of wear, like cracks or warping, it can't maintain ideal brewing conditions. Timely replacement guarantees you enjoy the full spectrum of flavors in your coffee, preserving that vital balance between brewing temperature and flavor extraction.
Compatibility With Machine
Understanding the compatibility of your brewing basket with your coffee maker is essential for maintaining ideal performance. If you find your brewing basket isn't functioning as intended, it may be time to contemplate replacing it. Verify you check for:
- Machine model compatibility: Confirm that the new brewing basket is specifically designed for your coffee maker's model.
- Material compatibility: Determine if the materials of the new basket align with your coffee maker's heating element to avoid melting or warping.
- Size compatibility: Ascertain the dimensions of the basket match your coffee maker's design to prevent leaks or overflow.
How to Replace a Broken Brewing Basket
Replacing a broken brewing basket can restore your coffee maker's functionality and improve your brewing experience. First, identify the brewing basket materials; common options include plastic, stainless steel, and glass. Next, consider basket design variations, ensuring the replacement fits your model perfectly. It's important to use quality coffee beans to ensure optimal flavor extraction in your coffee.
Here's a quick reference table to help you choose the right replacement:
| Material | Design Variation | Compatibility |
|---|---|---|
| Plastic | Standard | Most drip makers |
| Stainless Steel | Reusable filter | High-end machines |
| Glass | Carafe style | Specific brands |
| Composite | Multi-basket | Versatile models |
Once you've selected the appropriate basket, simply remove the old one and install the new one, ensuring it's securely in place. Enjoy your revitalized coffee maker!
Preventative Maintenance Tips for Your Coffee Maker
While regular use of your coffee maker is essential for brewing delicious coffee, neglecting its maintenance can lead to decreased performance and longevity. To guarantee your coffee maker remains in peak condition, follow these preventative maintenance tips:
- Routine cleaning: Clean all removable parts after each use to prevent coffee oils from building up. Use vinegar or a descaling solution monthly to remove mineral deposits.
- Proper storage: When not in use, store your coffee maker in a dry, cool place. Avoid leaving it exposed to humidity or direct sunlight.
- Check components: Regularly inspect the brewing basket, carafe, and water reservoir for wear and tear, replacing any damaged parts promptly. Additionally, consider using CLR for cleaning to effectively remove tough lime and calcium deposits that can accumulate over time.
Troubleshooting Other Coffee Maker Issues
Even with regular maintenance, coffee makers can encounter issues that affect their performance. If your coffee's tasting weaker than usual, check the coffee strength setting. Confirm you're using the right coffee-to-water ratio; a common guideline is one to two tablespoons of coffee per six ounces of water. If the brewing temperature feels off, verify that your machine is reaching the ideal range of 195°F to 205°F. Insufficient heating can lead to under-extraction, resulting in a lackluster cup. Additionally, if you notice inconsistent brewing, inspect the water reservoir for clogs or mineral buildup. Regular descaling helps maintain consistent performance, making sure your coffee remains flavorful and robust. Don't overlook these aspects to enjoy your perfect brew. It's recommended to clean and descale your coffee maker once every 2-3 months to prevent issues related to calcium deposits and limescale build-up.
Frequently Asked Questions
Can I Use a Different Basket for My Coffee Maker?
Choosing a coffee basket's like finding the right puzzle piece; it must fit. You can use alternative options, but make certain they have basket compatibility with your model to avoid leaks or poor brewing results.
How Long Should a Brewing Basket Typically Last?
A brewing basket's lifespan typically ranges from six months to two years, depending on usage and maintenance. You should consider replacement frequency based on performance decline, ensuring peak coffee quality and your brewing experience remains enjoyable.
Are There Any Warranty Options for My Coffee Maker?
If your coffee maker's acting up, it's worth checking warranty coverage. Most brands offer warranty options for repairs. Review the terms to see what's covered and ascertain you've got the freedom to fix it right.
What Types of Brewing Baskets Are Available for My Model?
For your coffee maker, you'll find various brewing basket types, including flat-bottom and cone styles. Make certain you select compatible models that match your machine's specifications for peak performance and brewing freedom.
Can I Fix a Cracked Brewing Basket With Adhesive?
You can attempt to fix a cracked brewing basket with adhesive, but make certain it's compatible with the basket materials. Different adhesive types, like epoxy or super glue, offer varying strength and durability for your repair.