If your coffee maker's spitting water or coffee, first identify any symptoms like leaks or odd sounds. Then, check for clogs in the water line by inspecting for blockages and using a vinegar solution to clear buildup. Next, inspect and clean the coffee filter, brew basket, and carafe to verify they're all residue-free. Finally, test the heating element for functionality. Follow these steps for effective maintenance, and you'll discover more troubleshooting tips.
Identify the Symptoms of a Malfunctioning Coffee Maker
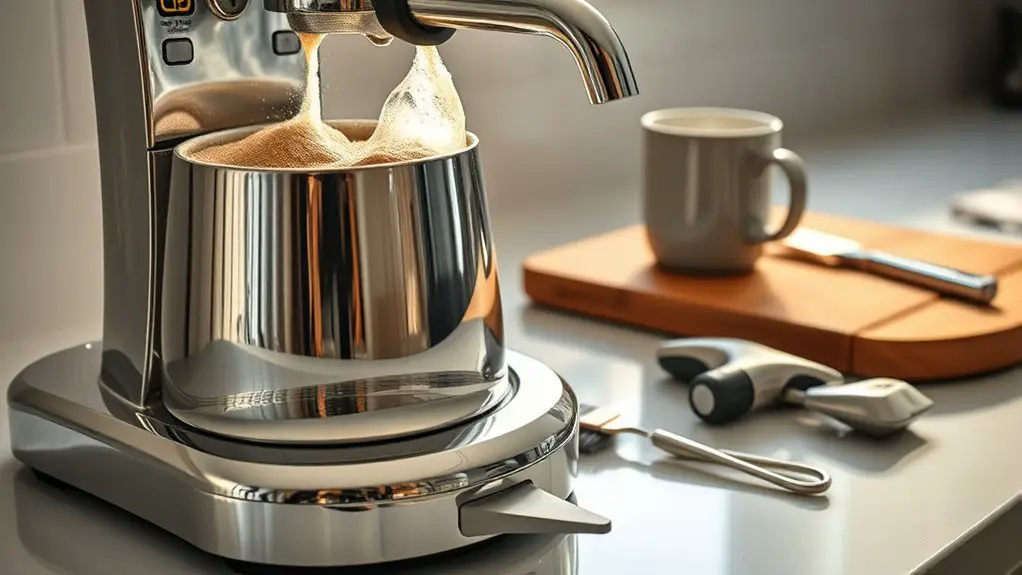
When your coffee maker isn't working as it should, how can you tell what's wrong? Start by observing for signs of leaks; water pooling around the machine often indicates an issue. Perform leak detection by checking seals and connections. If you notice steam buildup escaping from the lid or sides, it could suggest a malfunctioning pressure valve or improper assembly. Additionally, listen for unusual sounds during brewing, which might signal internal problems. If coffee splatters or sputters, it may indicate that water isn't flowing correctly. Regular maintenance, including checking for clogs, is essential to ensure optimal functionality. Document these symptoms carefully, as they'll help you diagnose the problem more effectively. Addressing these indicators promptly can restore your coffee maker's performance and keep your mornings uninterrupted.
Check for Clogs in the Water Line
One of the most common issues with coffee makers is a clogged water line. This can prevent water from flowing properly, leading to spitting or uneven brewing. To tackle this problem, follow these steps for effective clog removal:
- Unplug the coffee maker to guarantee safety.
- Inspect the water line for visible blockages; look for mineral buildup or debris.
- Use a thin brush or pipe cleaner to gently clear any clogs in the line.
- Run a vinegar solution through the machine to dissolve any remaining buildup, followed by a cycle of clean water. Regular maintenance, including cleaning with vinegar, can help prevent clogging and leaks in the future.
Inspect and Clean the Coffee Filter
After addressing potential clogs in the water line, it's important to turn your attention to the coffee filter. Proper filter maintenance is essential for peak brewing performance. Start by removing the filter and inspecting it for any buildup or residue. If you notice any, employ effective cleaning techniques. Rinse it under warm water or soak it in a vinegar solution to eliminate stubborn stains. Regular cleaning prevents clogging of holes in the portafilter, ensuring safe and enjoyable coffee consumption.
Here's a quick reference table for cleaning methods:
| Cleaning Method | Frequency |
|---|---|
| Rinse under water | After each use |
| Vinegar soak | Weekly |
| Replace filter | Monthly |
Regularly maintaining your coffee filter guarantees your coffee maker functions correctly and brews a great cup every time.
Examine the Brew Basket and Carafe
The brew basket and carafe play crucial roles in the coffee-making process, so it's important to inspect them regularly. A thorough carafe inspection guarantees your coffee maker functions efficiently and delivers great taste. Here's what you should check:
- Cleanliness: Verify both the brew basket and carafe are free from coffee residue and oils.
- Cracks or Damage: Look for any cracks in the carafe that could lead to leaks during brewing.
- Proper Fit: Confirm that the brew basket is seated correctly to prevent water from spilling.
- Seal Integrity: Check the carafe lid for a tight seal to maintain ideal brewing temperature. Additionally, ensuring the brew basket is not clogged by using high-quality coffee filters can help prevent overflow during the brewing process.
Test the Heating Element
To guarantee your coffee maker heats properly, start by inspecting the connections of the heating element for any signs of damage or corrosion. Next, use a multimeter to measure the resistance of the heating element, as this will help you determine if it's functioning correctly. If the readings are off, it may be time to replace the heating element.
Inspect Heating Element Connections
One essential step in troubleshooting your coffee maker is inspecting the heating element connections. If you're experiencing connection issues, ensuring the heating element is properly connected is vital. Follow these steps:
- Unplug the Coffee Maker: Always prioritize safety before inspecting connections.
- Access the Heating Element: Open the appliance's housing to locate the heating element.
- Check for Loose Wires: Inspect all wire connections; any loose wires can cause improper heating.
- Look for Corrosion: Examine connections for rust or corrosion, which can disrupt the electrical flow.
Measure Resistance With Multimeter
After ensuring the heating element connections are secure, measuring the resistance with a multimeter is the next step in evaluating its functionality. Set your multimeter to the resistance measurement mode, typically denoted by the ohm (Ω) symbol. Place the multimeter probes on the heating element terminals; it doesn't matter which probe goes where. A functional heating element should show a specific resistance value, usually between 10 and 30 ohms, depending on your coffee maker model. If you get a reading of zero or infinite resistance, the heating element is likely faulty. Mastering multimeter usage not only aids in diagnosing this issue but empowers you to maintain your coffee maker effectively. Keep your equipment and coffee experience at their best!
Perform a Thorough Cleaning of the Coffee Maker
A thorough cleaning of your coffee maker is essential for maintaining peak performance and guaranteeing the best flavor in your brews. Follow these steps to effectively clean your machine:
- Unplug the Coffee Maker: Always disconnect it from the power source to guarantee safety.
- Prepare a Cleaning Solution: Mix equal parts of water and vinegar to create a natural cleaning solution.
- Run the Vinegar Rinse: Pour the solution into the reservoir and run a brewing cycle without coffee. This will help eliminate mineral buildup.
- Flush with Fresh Water: After the vinegar rinse, run two cycles with plain water to remove any residual vinegar taste. Additionally, for tougher mineral deposits, consider using CLR's cleaning solution as it is more effective than vinegar.
When to Seek Professional Help
When should you consider calling in a professional for your coffee maker issues? If you've performed basic troubleshooting and cleaning, yet your coffee maker continues to exhibit signs of malfunction, it's time to seek help. Look for persistent problems like inconsistent brewing, strange noises, or leaks that cleaning hasn't resolved. If you notice electrical issues, such as sparks or burnt smells, don't hesitate; these can indicate serious risks. Additionally, if your machine is under warranty, contacting a professional guarantees you won't void it. Remember, while DIY fixes can be empowering, knowing when to call for professional assistance is essential for both your safety and your coffee maker's longevity. Trust your instincts; your coffee deserves the best care possible. If water leakage is a common issue among Saeco Xelsis users, it's wise to consult with an expert.
Frequently Asked Questions
Can I Use Vinegar to Clean My Coffee Maker?
Yes, you can use vinegar to clean your coffee maker. Vinegar's benefits include breaking down mineral buildup and bacteria. Mix it with water as a cleaning solution, then run it through your machine for best results.
How Often Should I Clean My Coffee Maker?
You should clean your coffee maker at least once a month for ideal performance. Following these maintenance tips guarantees longevity and efficiency. Regular cleaning frequency prevents buildup, making sure you enjoy great-tasting coffee every time you brew.
What Types of Coffee Makers Are Most Prone to Spitting?
Did you know that nearly 30% of coffee lovers encounter issues with their machines? Drip coffee makers and espresso machines are particularly prone to spitting, often due to clogs or improper brewing techniques.
Is It Safe to Use a Coffee Maker With a Cracked Carafe?
Using a coffee maker with a cracked carafe raises safety concerns. It can leak hot liquid, causing burns or damage. It's best to replace the carafe to guarantee safe and efficient brewing while avoiding potential hazards.
What Warranty Options Are Available for Faulty Coffee Makers?
When your coffee maker's dreams of brewing are dashed, warranty claims can be your saving grace. Explore your repair options based on purchase date, ensuring you reclaim that caffeinated freedom without breaking the bank.