To remove a stuck coffee pod from your coffee maker, first unplug it and make sure it's cooled down. Identify the type of your coffee maker and open the brew head. Inspect the pod and the area for damage or obstructions. Apply gentle pressure to wiggle the pod out, using tools like pliers if needed. Clean the brew area afterward to prevent future jams. Maintaining your coffee maker is key for peak performance, and you'll find more tips ahead.
Identify the Type of Coffee Maker
Before you attempt to remove a stuck coffee pod, it's important to identify the type of coffee maker you're using, as different models have varying mechanisms for pod insertion and ejection. Common coffee maker types include single-serve, drip, and espresso machines, each with specific pod compatibility. For instance, Keurig machines typically use K-Cups, while Nespresso machines require their proprietary capsules. Check your maker's manual or the manufacturer's website to verify you're using the correct pod. This understanding will help you avoid damaging your coffee maker or the pod itself during removal. Knowing the type of machine also aids in determining the best approach for extraction, whether it involves a simple push, twist, or using additional tools.
Unplug the Coffee Maker
Unplugging the coffee maker is an essential step before attempting to remove a stuck coffee pod. This safety precaution safeguards you from potential electrical shock while guaranteeing your machine is completely powered down. To effectively disconnect your coffee maker from its power source, follow these steps:
Unplugging your coffee maker is crucial for safety before removing a stuck coffee pod, ensuring no electrical hazards.
- Locate the power cord and gently pull it from the outlet.
- Confirm that any residual heat from the machine has dissipated.
- Allow the coffee maker to cool down to prevent burns.
Open the Brew Head
With the coffee maker unplugged and cooled down, the next step is to open the brew head. Locate the latch or button that secures the brew head and gently press or lift it, depending on your model. This action will release the brew head, allowing you access to the internal components. Be cautious while performing this step, as there may be residual coffee grounds or debris. Regularly opening the brew head can help maintain your coffee maker's efficiency, so keep this as one of your maintenance tips. Regular cleaning and descaling will also prevent issues like clogging, ensuring optimal performance. Once open, you'll be better positioned to address the stuck pod issue. Make sure you're handling all parts with care to avoid damage during this process.
Inspect the Stuck Pod
Now that you've opened the brew head, inspect the stuck pod carefully. Check for any visible damage to the pod itself, as well as the brewing chamber area for any signs of wear. Additionally, look for debris buildup that could be contributing to the pod's stuck position. It's also important to ensure that the brewing chamber maintenance is regularly performed to prevent obstructions that could cause pods to get stuck.
Check for Visible Damage
Before attempting to remove a stuck coffee pod, it's essential to inspect the pod for any visible damage that could complicate the extraction process. Different coffee pod types may behave differently under stress, so keep an eye out for any signs of wear.
Check for the following:
- Tears or Rips: Any damage can hinder removal and create mess.
- Warping: A misshapen pod may become lodged more securely.
- Debris: Coffee grounds or foreign objects could be complicating the stuck situation.
Identifying such issues is important for effective coffee maker maintenance. If you notice any of these problems, it may be necessary to adjust your approach in removing the pod to avoid further complications.
Examine Brewing Chamber Area
As you focus on extracting the stuck coffee pod, closely examine the brewing chamber area to identify any obstructions or issues that might be contributing to the problem. Verify that your coffee pod is compatible with your machine, as using the wrong type can lead to jams. Regular brewing chamber maintenance is essential for peak performance.
| Potential Issue | Description | Solution |
|---|---|---|
| Incorrect Pod Type | Pod doesn't fit the chamber | Check for compatibility |
| Misalignment | Chamber parts aren't aligned | Realign the components |
| Blockage | Debris or old coffee grounds | Clear the area thoroughly |
Look for Debris Buildup
Inspecting the stuck coffee pod is essential, as debris buildup can often be the culprit behind the jam. You should carefully check for various debris types that might be obstructing the brewing process. Look for:
- Coffee grounds that have spilled over
- Residue from previous pods
- Mineral buildup from water
These blockages can prevent the pod from being ejected smoothly. To address this issue, follow these maintenance tips: first, turn off the coffee maker and unplug it for safety. Next, gently clean the brewing chamber using a soft cloth or brush. Finally, verify that the pod holder is clear of any remnants. By maintaining a clean machine, you'll avoid future jams and enjoy uninterrupted coffee brewing.
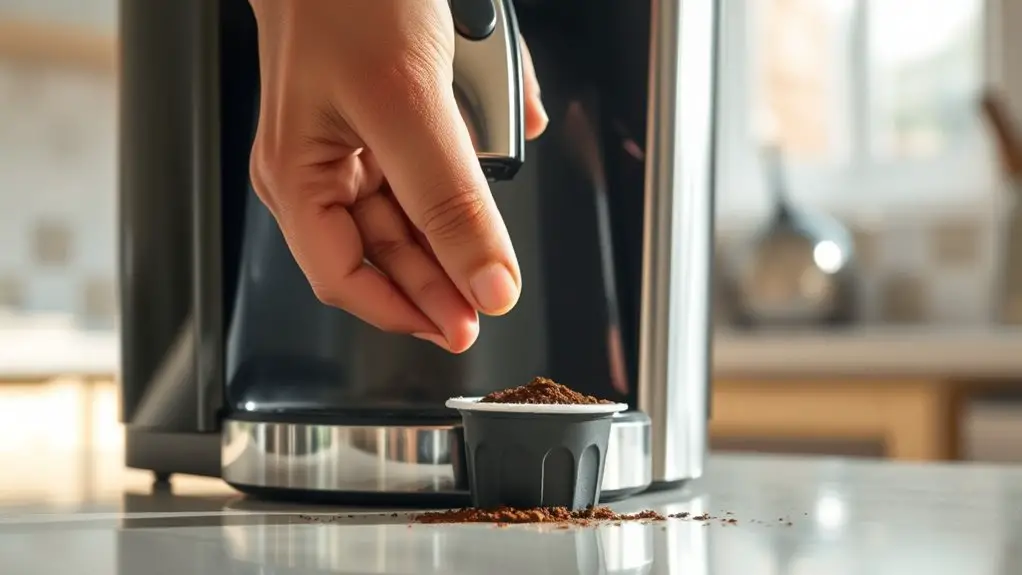
Use Gentle Force to Remove the Pod
Once you've assessed the situation, it's time to apply controlled pressure to the stuck pod. Use your hands to gently wiggle the pod while maintaining a steady grip. If needed, consider using proper tools like a rubber grip or a spoon to assist without damaging the machine.
Assess the Situation
Evaluating the situation before attempting to remove a stuck coffee pod is essential to avoid damaging your machine. Start by identifying any potential coffee maker troubleshooting signs, such as unusual noises or leaks. Check for pod compatibility issues, guaranteeing the pod you're using is designed for your specific coffee maker model.
Consider the following:
- Inspect the pod for visible damage or deformation.
- Confirm the coffee maker is powered off and unplugged for safety.
- Review the user manual for specific guidance related to pod removal.
Apply Controlled Pressure
Gently apply controlled pressure to the coffee pod to dislodge it from the brewing chamber. Begin by placing your fingers around the pod, ensuring a firm yet gentle grip. Using controlled techniques, press down evenly on the sides of the pod while simultaneously attempting to pull it upward. This pressure application should be steady and deliberate; avoid yanking or jerking to prevent damage to the coffee maker. If the pod remains stuck, reposition your grip to target different areas of the pod, redistributing the pressure. Remember, the goal is to use gentle force without causing unnecessary strain on the machine. With patience, you should be able to remove the pod without further complications.
Use Proper Tools
Using the right tools can greatly improve your chances of successfully removing a stuck coffee pod. Proper technique combined with effective tool selection guarantees you won't damage your coffee maker. Here are some tools you might find useful:
- A pair of needle-nose pliers for gentle grip
- A flathead screwdriver to pry gently without breaking
- A soft cloth to prevent scratches during removal
When you use these tools, apply gentle force to avoid any unnecessary damage to the machine. Start by gripping the pod carefully with the pliers, then twist slightly while pulling upwards. If the pod remains stuck, use the screwdriver to pry around the edges, but be cautious. This strategic approach guarantees you'll reclaim your coffee maker without a hitch.
Clean the Brew Area
To guarantee peak performance and prevent future jams, it's vital to clean the brew area of your coffee maker. Start by unplugging the machine to assure safety. Remove the brew basket and any used coffee pods, then wash the basket with warm soapy water. Rinse thoroughly and let it dry. For the brew area maintenance, use a damp cloth to wipe down the interior, focusing on any coffee residue or buildup. Consider using a soft brush for hard-to-reach spots. Regularly inspect for any clogs or blockages in the needle or filter. Employing these cleaning techniques not only keeps your coffee maker running smoothly but also enhances the flavor of your coffee. Remember, a clean machine is essential for best results. Regular cleaning prevents calcium deposits and internal mold growth, ensuring your coffee maker operates efficiently.
Test the Coffee Maker
Once you've cleared any stuck coffee pods and cleaned the brew area, it's vital to test the coffee maker to confirm it's functioning properly. This step is essential to guarantee you won't face brewing issues down the line.
- Run a water-only cycle to check for leaks.
- Monitor the brewing process for any unusual sounds or delays.
- Inspect the final output for proper temperature and flavor.
These simple checks can aid in effective coffee maker troubleshooting. If you notice any irregularities during this test, further investigation may be needed to diagnose underlying problems. Addressing these issues now will help you enjoy your coffee without interruptions in the future. Remember, a well-functioning coffee maker is key to your daily brew experience!
Frequently Asked Questions
Can Coffee Pods Get Stuck in Any Type of Coffee Maker?
Yes, coffee pods can get stuck in various coffee maker types, especially if they're not compatible. Ensuring pod compatibility with your machine reduces the chances of jams, allowing for a smoother brewing experience.
What Should I Do if the Pod Is Damaged?
If you've got damaged pods in your coffee maker, turn it off, unplug it, and carefully remove the pod. Check for any remaining pieces, then clean the area to guarantee proper functionality before using new pods.
How Can I Prevent Coffee Pods From Getting Stuck?
To prevent coffee pods from getting stuck, focus on coffee pod maintenance and proper storage. Keep your pods dry, store them upright, and avoid excessive force when inserting them into the machine for smoother brewing experiences.
Is It Safe to Use Tools to Remove a Stuck Pod?
Using tools to remove a stuck pod can pose safety concerns, so be cautious. If necessary, use plastic utensils like a butter knife or spoon. Avoid metal tools to prevent damage to your coffee maker's components.
What if the Coffee Maker Won't Turn on After Removing the Pod?
If your coffee maker won't turn on, check for electrical issues first. Verify it's plugged in, inspect the outlet, and reset any circuits. This coffee maker troubleshooting can often resolve the problem quickly and easily.