If your coffee maker won't pump water, start by checking the water reservoir. Verify it's filled and properly seated. Next, inspect the water line for blockages or leaks. Clean the coffee maker to remove any mineral buildup and check the brew basket for clogs. Finally, test the pump mechanism by running a cycle without coffee grounds. If issues persist despite these steps, there are additional strategies that can help resolve your problem effectively.
Check the Water Reservoir
When troubleshooting your coffee maker, the first step is to check the water reservoir. Verify the water level is adequate; if it's too low, the machine won't function properly. Remove the reservoir and inspect it for cleanliness. Any buildup or residue can impede water flow, affecting the brewing process. Rinse the reservoir with warm, soapy water, making sure to eliminate any leftover coffee oils or mineral deposits. After cleaning, thoroughly dry it before reinserting. If the reservoir isn't seated correctly, that can also prevent water from reaching the brewing mechanism. By maintaining the reservoir's cleanliness and verifying the water level is satisfactory, you'll enhance your coffee maker's performance and prolong its lifespan, granting you the freedom to enjoy your brews uninterrupted. Additionally, ensure that the water reservoir lid is properly closed to prevent overflow situations.
Inspect the Water Line
Before proceeding, you'll need to inspect the water line for potential issues. Start by checking for blockages that could restrict water flow, then examine hose connections for any leaks or disconnections. Finally, assess the water source to verify it's functioning properly and supplying adequate pressure. Additionally, be aware that clogged coffee makers can lead to excessive water dispensing, which may be a symptom of larger issues.
Check for Blockages
To tackle issues with your coffee maker, checking for blockages in the water line is crucial. Start by inspecting the line for any clogs or debris that may prevent water from flowing. Common blockage causes include mineral buildup and coffee grounds.
Here's a quick reference table to help you identify potential issues:
| Blockage Causes | Prevention Tips |
|---|---|
| Mineral buildup | Regular descaling |
| Coffee grounds | Using a paper filter |
| Air bubbles | Priming the water line |
If you find a blockage, clear it gently using a soft brush or warm water. Regular inspection and maintenance will guarantee your coffee maker operates smoothly and prolong its lifespan.
Inspect Hose Connections
Inspecting hose connections is essential for ensuring your coffee maker functions properly. Begin by examining each hose for signs of wear or damage, as compromised hose integrity can lead to leaks and water flow issues. Next, check the connection tightness at both ends of the hoses. Loose connections may allow air pockets or blockages that prevent water from flowing smoothly. If you find any loose fittings, tighten them gently to avoid damaging the hose. Additionally, inspect for any kinks or bends in the hoses, which can also impede water flow. By ensuring that the hoses are in good condition and properly connected, you'll enhance your coffee maker's performance and enjoy consistent brewing.
Assess Water Source
Once you've verified the hose connections are secure, it's time to assess the water source by inspecting the water line. Start by checking if the water supply is fully turned on; a partially closed valve can lead to pressure issues. Next, look for any visible kinks or blockages in the water line that could restrict flow. You should also examine the line for leaks, as any water loss can affect pump performance. If you suspect pressure issues, consider using a pressure gauge to measure the water supply's PSI. Ensuring ideal water flow and pressure is essential for your coffee maker to function correctly, so address any problems you discover promptly to restore your machine's efficiency.
Clean the Coffee Maker
To guarantee peak performance, you need to clean your coffee maker regularly. Start by descaling the machine to remove mineral buildup, which can affect brewing efficiency and flavor. Next, address the water reservoir, as it can harbor residues and bacteria, compromising the quality of your coffee. Regularly monitoring for internal clogging or blockage can help prevent further issues with water flow in your coffee maker.
Descaling the Machine
Descaling the machine is an essential maintenance step that guarantees your coffee maker operates efficiently and produces great-tasting coffee. Over time, mineral buildup from hard water can clog internal components, affecting performance. To descale, use a recommended descaling solution or a mixture of equal parts vinegar and water. Pour the solution into the water reservoir and run a brew cycle without coffee grounds. After completion, let the machine sit for about 15 minutes to allow the solution to work effectively. Then, run two or three cycles with fresh water to remove any residual taste. It's advisable to descale your coffee maker every three to six months, depending on your descaling frequency and water hardness, ensuring peak functionality.
Cleaning Water Reservoir
After descaling, it's important to address the water reservoir, as it can accumulate mineral deposits and bacteria over time. Start by unplugging your coffee maker and removing the reservoir. Rinse it thoroughly under warm water, making sure you get into all corners. For stubborn stains or buildup, create a solution of equal parts vinegar and water. Soak the reservoir for 15-30 minutes, then scrub gently with a soft brush. Rinse completely to avoid any lingering vinegar taste, which can affect water quality. Monthly reservoir maintenance is recommended to keep your coffee maker functioning at its best. Regular cleaning helps guarantee that your coffee remains fresh and free from contaminants, enhancing your overall coffee-making experience.
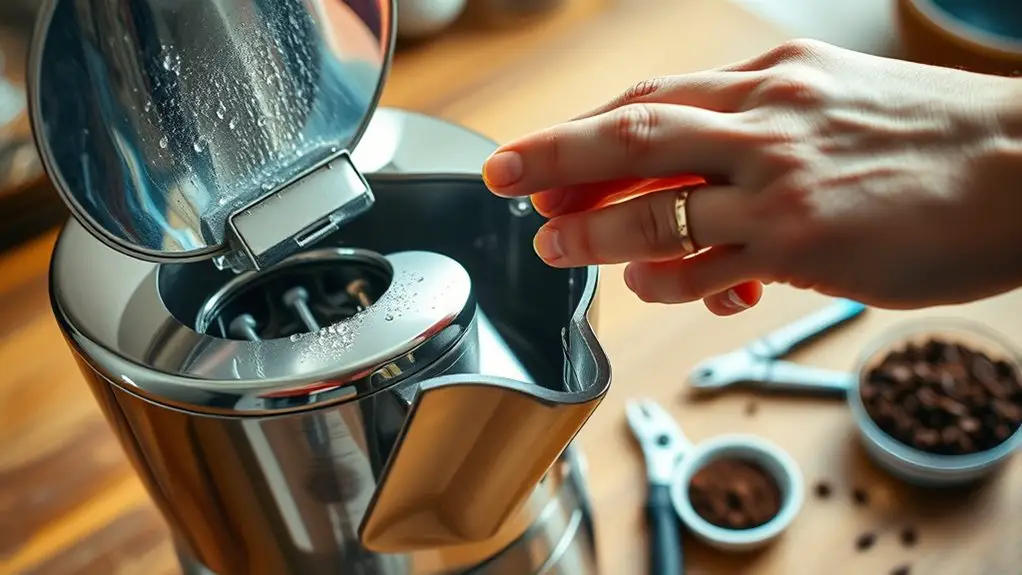
Examine the Brew Basket
The brew basket is a crucial component of your coffee maker, as it holds the ground coffee during the brewing process. If your coffee maker isn't pumping water, examining the brew basket design can reveal issues. Here's what to check:
The brew basket is essential for coffee brewing; check it for clogs, alignment, and damage if water isn't pumping.
- Clogged Filters: Verify the filter isn't blocked by coffee grounds, which can impede water flow.
- Proper Seating: Confirm the brew basket is correctly positioned in the coffee maker; misalignment can disrupt the brewing process.
- Damaged Components: Inspect for any cracks or damage in the brew basket that could prevent it from holding coffee grounds effectively. Additionally, a clogged water line can contribute to issues with water flow, so be sure to check for any blockages that may be affecting the overall performance of your coffee maker.
Test the Pump Mechanism
Before diving into repairs, it's essential to test the pump mechanism since it plays an important role in transporting water from the reservoir to the brew basket. Start by unplugging your coffee maker for safety. Next, locate the pump, typically found underneath the machine. Check for any visible blockages or debris that could impede water flow. If it seems clear, plug the machine back in and run a brew cycle without coffee grounds. Listen for the pump's operation; you should hear a humming sound. If there's silence or sputtering, you may need to clean or replace the pump. Regular pump maintenance can prevent issues, so keep these troubleshooting tips handy for future reference.
Seek Professional Help
If you've tried troubleshooting your coffee maker and still face persistent issues, seeking professional help might be the best course of action. A qualified coffee technician can diagnose the problem more accurately and perform necessary repairs. Consider these steps when seeking repair services:
- Research Local Technicians: Look for technicians with good reviews and expertise in coffee maker repairs.
- Inquire About Estimates: Before agreeing to any service, request a detailed estimate to understand potential costs.
- Check Warranty Coverage: If your coffee maker is still under warranty, consult the manufacturer for authorized repair services.
Professional assistance can save you time and prevent further damage, ensuring your coffee maker operates efficiently once again. Additionally, be aware of common user experiences with coffee makers that may help you communicate issues effectively. Don't hesitate to reach out!
Frequently Asked Questions
What Causes a Coffee Maker to Stop Pumping Water?
A coffee maker might stop pumping water due to clogged lines or mineral buildup. These issues restrict water flow, preventing proper brewing. Regular maintenance, like descaling, can help you avoid such frustrating situations in the future.
How Often Should I Clean My Coffee Maker?
You should clean your coffee maker every three to six months, depending on usage. Regular maintenance tips include descaling and wiping surfaces to guarantee peak performance and longevity, allowing you to enjoy your coffee without hassle.
Can I Use Vinegar to Clean My Coffee Maker?
When it comes to cleaning solutions, using vinegar's benefits is like hitting two birds with one stone. Just mix equal parts vinegar and water, run it through, and enjoy a refreshed coffee maker.
Is It Safe to Repair a Coffee Maker Myself?
It's generally safe to repair a coffee maker yourself, but you should consider DIY safety and repair risks. Make certain you're familiar with the appliance's workings, and always unplug it before starting any repairs for safety.
How Long Should a Coffee Maker Last?
A coffee maker's lifespan typically ranges from five to ten years, depending on usage and maintenance. Common malfunctions, like clogged filters or heating element failures, can greatly impact longevity, so regular care is essential for ideal performance.